Features
Features Overview
Basic Features
Phone Calls
Connecting Analog Phones
There are two ways to make phone calls with the MCG-101 v2. The first is by attaching an external ATA (Analog Telephone Adapter) via the ethernet port, and the second is using a smartphone app or IP voip phone.
Connecting Analog Phones
The following ATAs are supported and have been tested:
- Grandstream HT801
- Grandstream HT802
- Cisco SPA112
Any of the Grandstream HT8xx products should work, but it’s possible they won’t all work “out of the box” – they may require some additional configuration. The following extensions have been pre-configured for Grandstream and Cisco SPA ATA devices supporting up to 8 lines.
| Username | Password | Proxy/SIP Server |
|---|---|---|
| 200 | 192.168.4.1 | |
| 201 | 192.168.4.1 | |
| 202 | 192.168.4.1 | |
| 203 | 192.168.4.1 | |
| 204 | 192.168.4.1 | |
| 205 | 192.168.4.1 | |
| 206 | 192.168.4.1 | |
| 207 | 192.168.4.1 |
Connecting VOIP Phones
The MCG-101 can route voice calls made on your smartphone through the Iridium network as regular Iridium satellite phone calls. In order to enable this feature, install the free Linphone app on iOS or Android, or any SIP phone app you like. Extension 210 has been pre-configured for use with Linphone using either TCP or UDP.
| Username | Proxy/SIP Server | |
|---|---|---|
| 210 | 192.168.4.1 |
Multiple users may be connected to the MCG-101 using the above information and all smartphones will ring upon an incoming call.
To make a call the MCG-101 must be powered ON and you must be connected to the MCG-101 wireless network. If you're experiencing any issues calling or registering, it is likely that your phone is not allowing you to connect to the wireless network because there is no active internet connection. Please do the following:
- Set your phone to airplane mode
- Turn on WiFi and connect to the MCG-101 v2
- Try placing a call again
How to place a call:
International: Dial 011 (country code) (phone number)
US: Dial 001 (phone number)
Iridium: Dial 8816 (phone number) or 008816 (phone number)
How to receive a call:
Dial the phone number of the Iridium SIM card installed in your MCG-101 v2.
Contact your Service Provider if you need assistance with your SIM cards.
Call Features
- Authentication
- AutomatedAttendant
- Blacklists
- Blind Transfer
- Call Detail Records
- Call Forward on Busy
- Call Forward on No Answer
- Call Forward Variable
- Call Monitoring
- Call Parking
- Call Queuing
- Call Retrieval
- Call Routing (DID & ANI)
- Call Snooping
- Call Transfer
- Call Waiting
- Conference Bridging
- Database Store/Retrieve
- Database Integration
- Dial by Name
- Direct Inward System Access
- Distinctive Ring
- Do Not Disturb
- Flexible Extension Logic
- Interactive Directory Listing
- Local and Remote Call Agents
- Macros
- Predictive Dialer
- Privacy
- Overhead Paging
- Protocol Conversion
- Remote Call Pickup
- Remote Office Support
- Roaming Extensions
- Supervised Transfer
- Talk Detection
- Three-way Calling
- Transcoding
- Graphical Call Manager
- Predictive Dialer
- Voice Mail
- Visual Indicator for Message Waiting
- Stutter Dial tone for Message Waiting
- Voicemail to email
- Voicemail Groups
- Web Voicemail Interface
WiFi Setup
Note!
The MCG-101 v2 comes with two WiFi interfaces, one with 802.11ac (5 GHz) support and the other without. By default, only the first WiFi interface is enabled.
To change the SSID (Access Point Name) and password use the following steps:
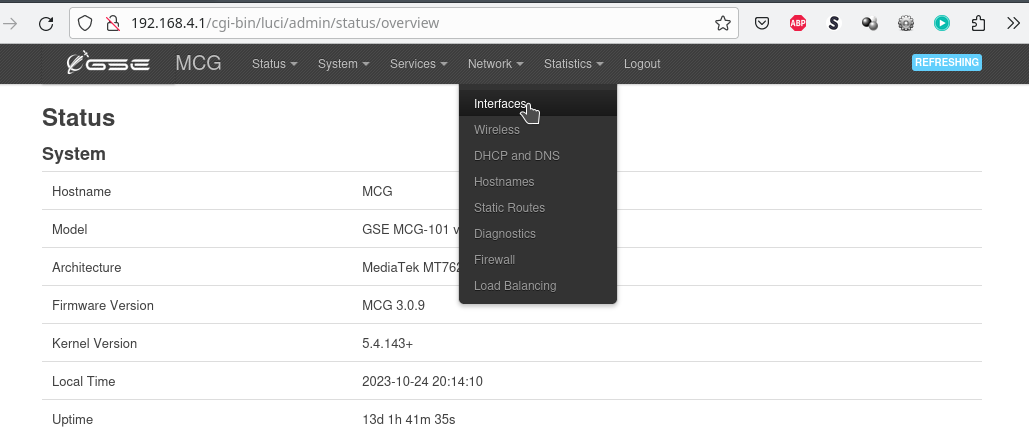
- In the interface go to the ‘Network’ dropdown menu and select ‘Wireless’
- Click ‘Edit’ next to the SSID of the desired WiFi device
- Scroll down to the ‘Interface Configuration’ section and edit the ‘ESSID’ box to the desired name
- Click ‘Save’ on the first window and then ‘Save and Apply’ on the second window
Login Information
Use your computer or device to connect via wifi.
- SSID: MCG-xxxxxx
- Password: none
Advanced Features
Firewall Settings
Disabling Built In Firewall
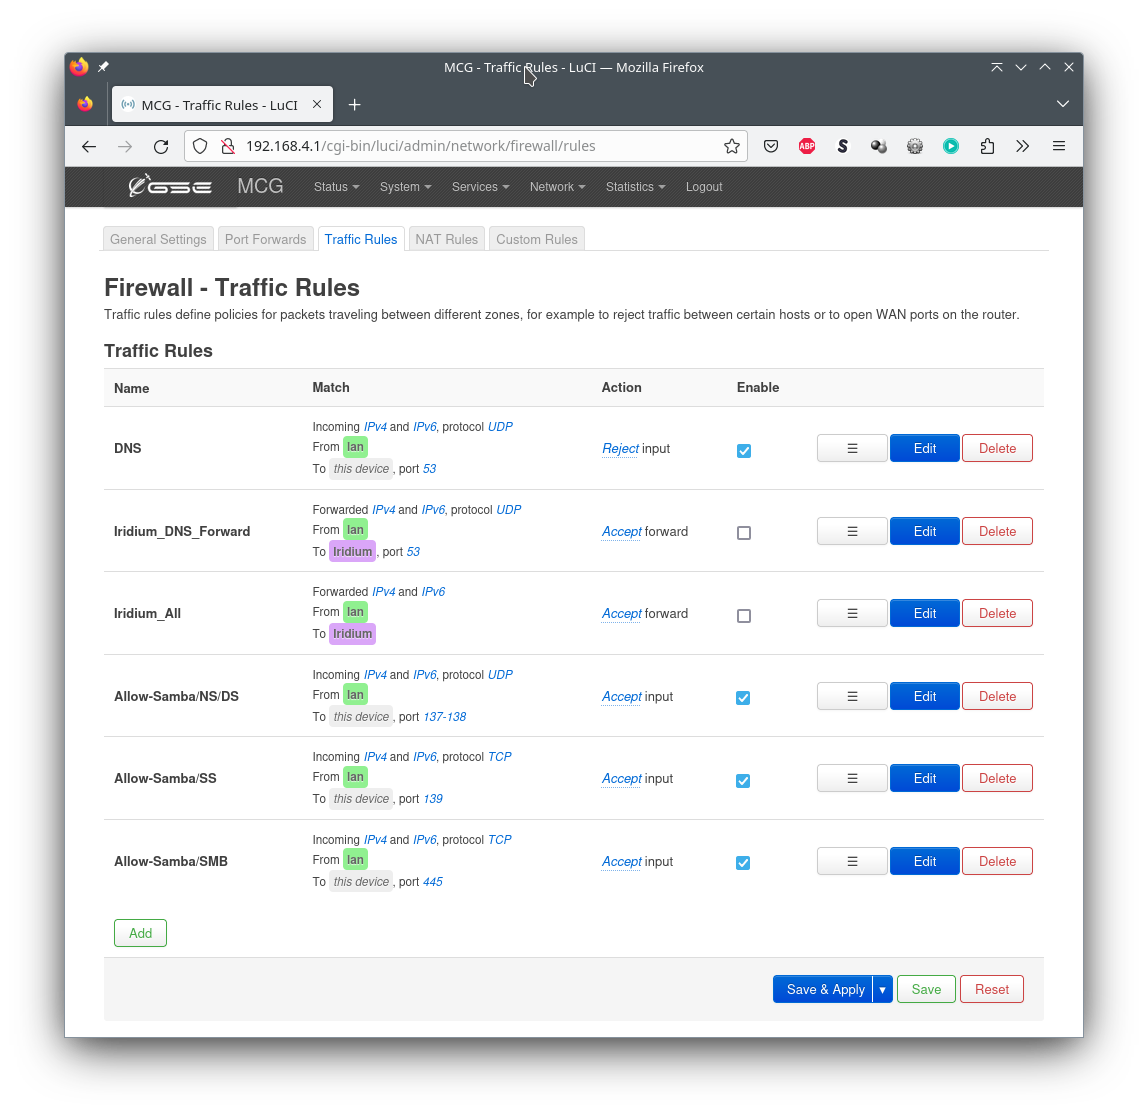
Network>Firewall>Firewall Rules - The firewall in the MCG-101 v2 is set up to block all traffic to the internet, so it must be enabled if you want unrestricted access to the internet. Check the rules named "Iridium_All" and "Iridium_DNS_Forward" (they are unchecked by default) and click "Save and Apply". This will enable all traffic to pass through the firewall.
Iridium Auto Connect
Setup Iridium To Connect On Any Traffic
Follow the instructions above to disable the built in firewall, then proceed with the following steps
Iridium Auto Connect
Setup Iridium To Connect On Any Traffic
Follow the instructions above to disable the built in firewall, then proceed with the following steps.
Navigate to Network → Interfaces
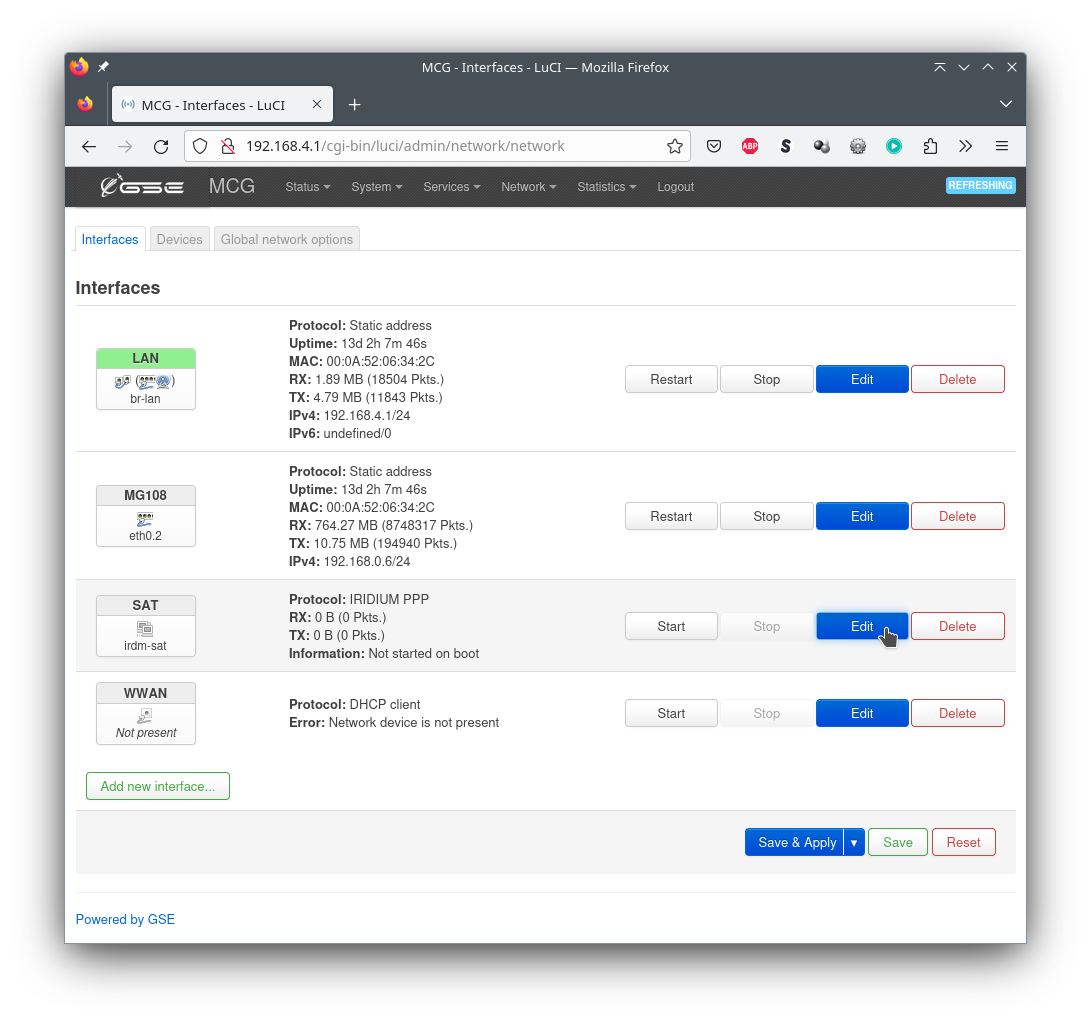
On the “SAT” interface, click the “Edit” button
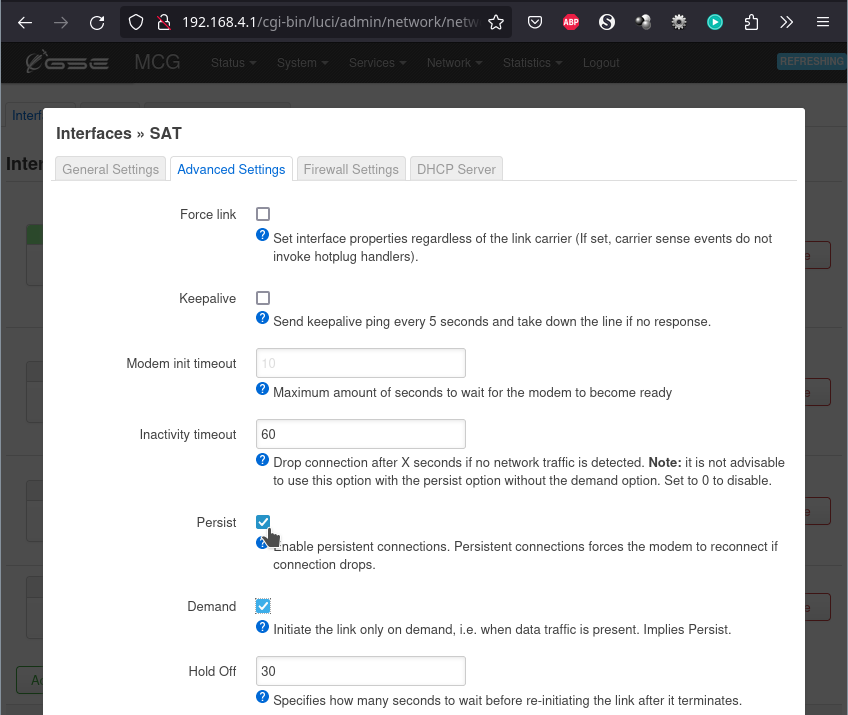
Click on the advanced tab and check/enable “Persist” and “Demand”
SSH Access
Secure Shell (SSH) is a mechanism for more technically oriented users to perform advanced and customized modifications and procedures on the MCG-101. Access is granted through the use of OpenSSH cryptographic keys. This generates a private/public key pair on your local computer. Your public key should never be shared or copied to any other system, keeping it secure and private. However, your public key file can be sent to different computers for authentication instead of a password.
Finding or generating your public key file
Note!
If you already have a private/public key pair on your computer, you should not overwrite it, or you will lose access to any system you’ve previously used your local key to access. Appropriate for your operating system are below.
Windows
Microsoft Windows does not use Secure Shell by default, so third-party programs are necessary. To use PuTTY, please see this tutorial. You can then copy the public key into your clipboard and proceed below.
UNIX (Linux and Mac)
For all UNIX users (including Linux and Mac), your public key file will be at ~/.ssh/id_rsa.pub by default. To see if you already have a public/private key pair, open a terminal window and print the contents of your public key with the following command:
cat .ssh/id_rsa.pub
If the file is missing (you get “No such file or directory“), you can generate it with the ssh-keygen command. This is an interactive program, but you can just hit <ENTER> for each of the three prompts to put the key in the default location without a password. (You can password-protect your key file if others can access your computer files or want added security.)
$ ssh-keygen
Generating public/private rsa key pair.
Enter file in which to save the key (/home/user/.ssh/id_rsa): <ENTER>
Created directory '/home/user/.ssh'.
Enter passphrase (empty for no passphrase): <ENTER>
Enter same passphrase again: <ENTER>
Your identification has been saved in /home/user/.ssh/id_rsa
Your public key has been saved in /home/user/.ssh/id_rsa.pub
The key fingerprint is:
SHA256:wZdELWVT9W/eXzd7dE9kYsZGxM0bB6cOz1KdU3l72tE user@1f001dff6305
The key's randomart image is:
+---[RSA 3072]----+
| .oo+++==|
| . ..o..o*O|
| o o..oooX|
| o \*\*+E|
| S .++*=|
| ..o\*|
| +B|
| O|
| .o|
+----[SHA256]-----+
Now print the contents as with the command above and copy the contents into the clipboard. (Alternatively, you can open it in a text editor.)
$ cat .ssh/id_rsa.pub
ssh-rsa AAAAB3NzaC1yc2EAAAADAQABAAABgQClB/SJY/I7HxVsNPKxDxSEXMHGdinaIyL3u9s1S8QFdH8K7wLp9
/jLcm2YUyVWaTbUQDOQQO3h3hm1W8PbHgVT6Fk6Xz2ryR5ZMEfXYnlOm+38rKg33RnJXUUkTNCyrKMbpvMZb6XQuv
xUY+59e1/pvhBg6QP3mDe9a6HZehF2xKeVYKmtR9EeUG4qKlXm3ma52vlDlbvkwqHth0PRWDjlsZo8zLOQ/GviIoX
77ZYVnOEb6wiAJBE38c+QdNesUVsNpE1+TM3y6BkPQ1RCEvT5NLbF3nLsyCoPqZo2ujUCRbo/zAoTmkSoG0l8bjWr
PwTEKeXJFGP+PtEg6BzsT0onizNYwO5m2kQL7/yhvnECSIppcdNpMUN1UtdnIuTIGEYrGQ67G/2m1Xuu0IXZ/Aqdi
gDhWgaeYCLCitjkwiUBiRwxjAJmxqO1ngeWVZF75gq7zKAVTKcFkCwI8qmRPs91HYGdQw4dzgB6T6GxNe7By85Z1h
uOrUI8goqwM1z/oI8= lordbuckethead@outlandishhostname
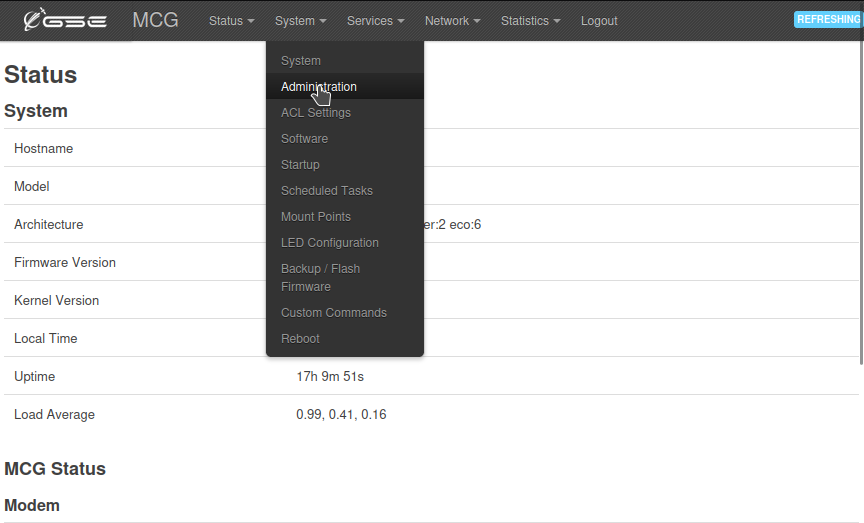
Navigate to the System → Administration menu.
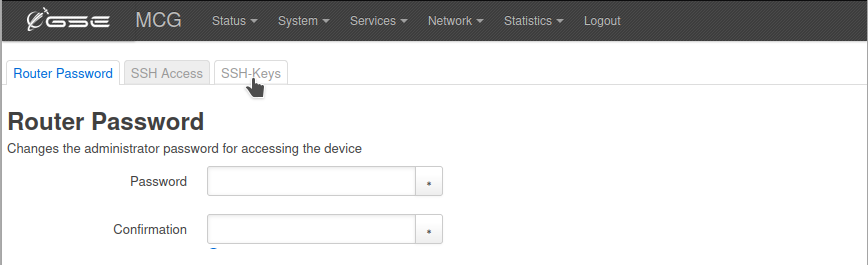
Select the SSH-Keys tab
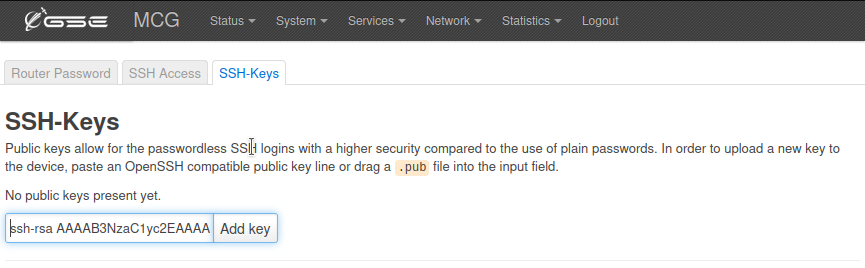
Paste the contents of your public key file into the text box and click the “Add key” button.
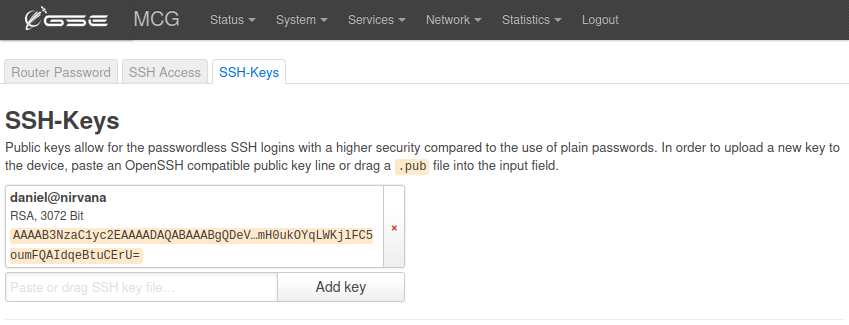
Once added, the result should look like the this:
Making an SSH Connection
Windows
UNIX (Linux and MaxOS)
Custom Asterisk Configuration
The MCG-101 uses the powerful and ubiquitous Asterisk software for all PBX functions. By default, Asterisk’s configuration is auto-generated using settings that provide plug-and-play functionality with popular ATA devices and the Linphone VOIP software for Android and iPhone. If a custom Asterisk configuration is required, follow these steps to disable auto-configuration.
You must first acquire SSH access by setting up and installing a public key to your computer’s local account. See the SSH Access section for instructions.
SSH to the MCG-101 with your favorite terminal software.
Set the Asterisk to use a static configuration by running the following commands (in bold)
(root@MCG)$ uci set asterisk.master.static_config=1
/root
(root@MCG)$ uci commit
/root
(root@MCG)$ /etc/init.d/asterisk restart
Edit configuration files in /etc/asterisk either using the vi editor in the terminal, or any SSH-enabled text editor installed on your computer.