Overview
GSatRancher Mounting Options
Mounting Animals
The GSatRancher offers two methods for mounting:
A) using the Ear Tag method, or B) using a Strap/Collar method.
Product Kit
1-Pin Product Kit
The product kit ships only with the following parts.
| Qty | Name | Weight | Photo |
|---|---|---|---|
| 1 | GSatRancher | 27.80g (0.02780kg) |  |
| 1 | Mounting Strap | 1.00g (0.00100kg) | 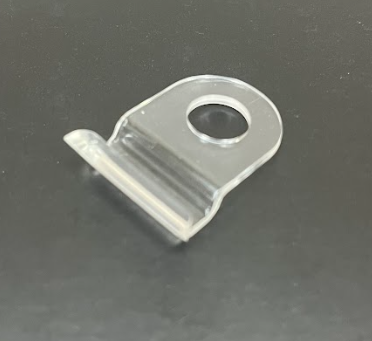 |
| 1 | Female Socket | 2.06g (0.00206kg) | 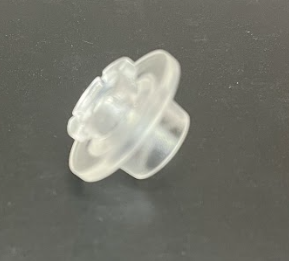 |
| 1 | Male Pin | 1.43g (0.00143kg) | 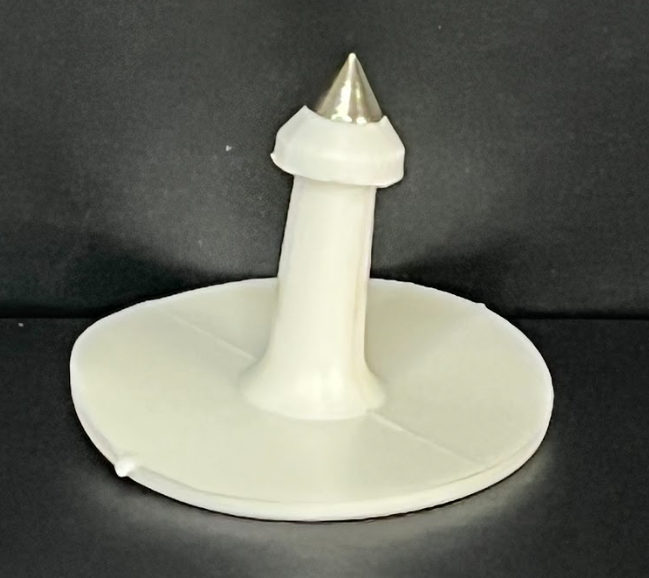 |
NOTE!
The total combined weight of the GSatRancher and 1-Pin components is 32.29g (0.03229kg).
GSatRancher 2-Pin Product Kit
Note!
The product kit ships only the following parts:
| Qty | Name | Weight | Photo |
|---|---|---|---|
| 1 | GSatRancher | 27.80g (0.02780kg) | |
| 1 | 2-Pin Mounting Clip | 5.87g (0.00587kg) | 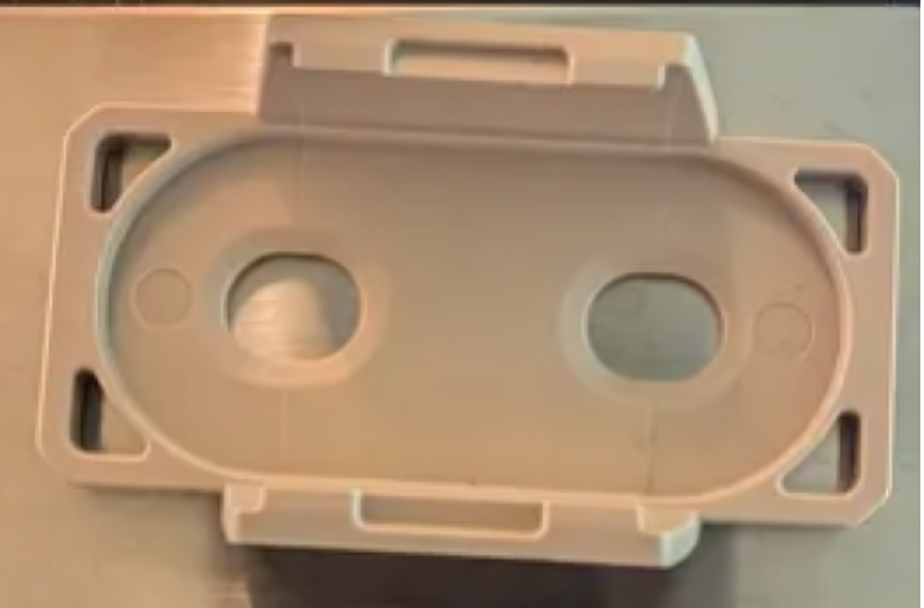 |
| 2 | Grommet (Female Socket) | 2.06g × 2 = 4.12g (0.00412kg) | |
| 2 | Male Pin | 1.43g × 2 = 2.86g (0.00286kg) | |
NOTE!
The total combined weight of the GSatRancher and 2-Pin components is 40.65g (0.04065kg).
GSatRancher Mounting Clip Product Kit
Note!
The product kit ships only the following parts:
| Qty | Name | Weight | Photo |
|---|---|---|---|
| 1 | GSatRancher | 27.80g (0.02780kg) | |
| 1 | Mounting Clip (Screw/Rivet holes) | 5.98g (0.00598kg) | 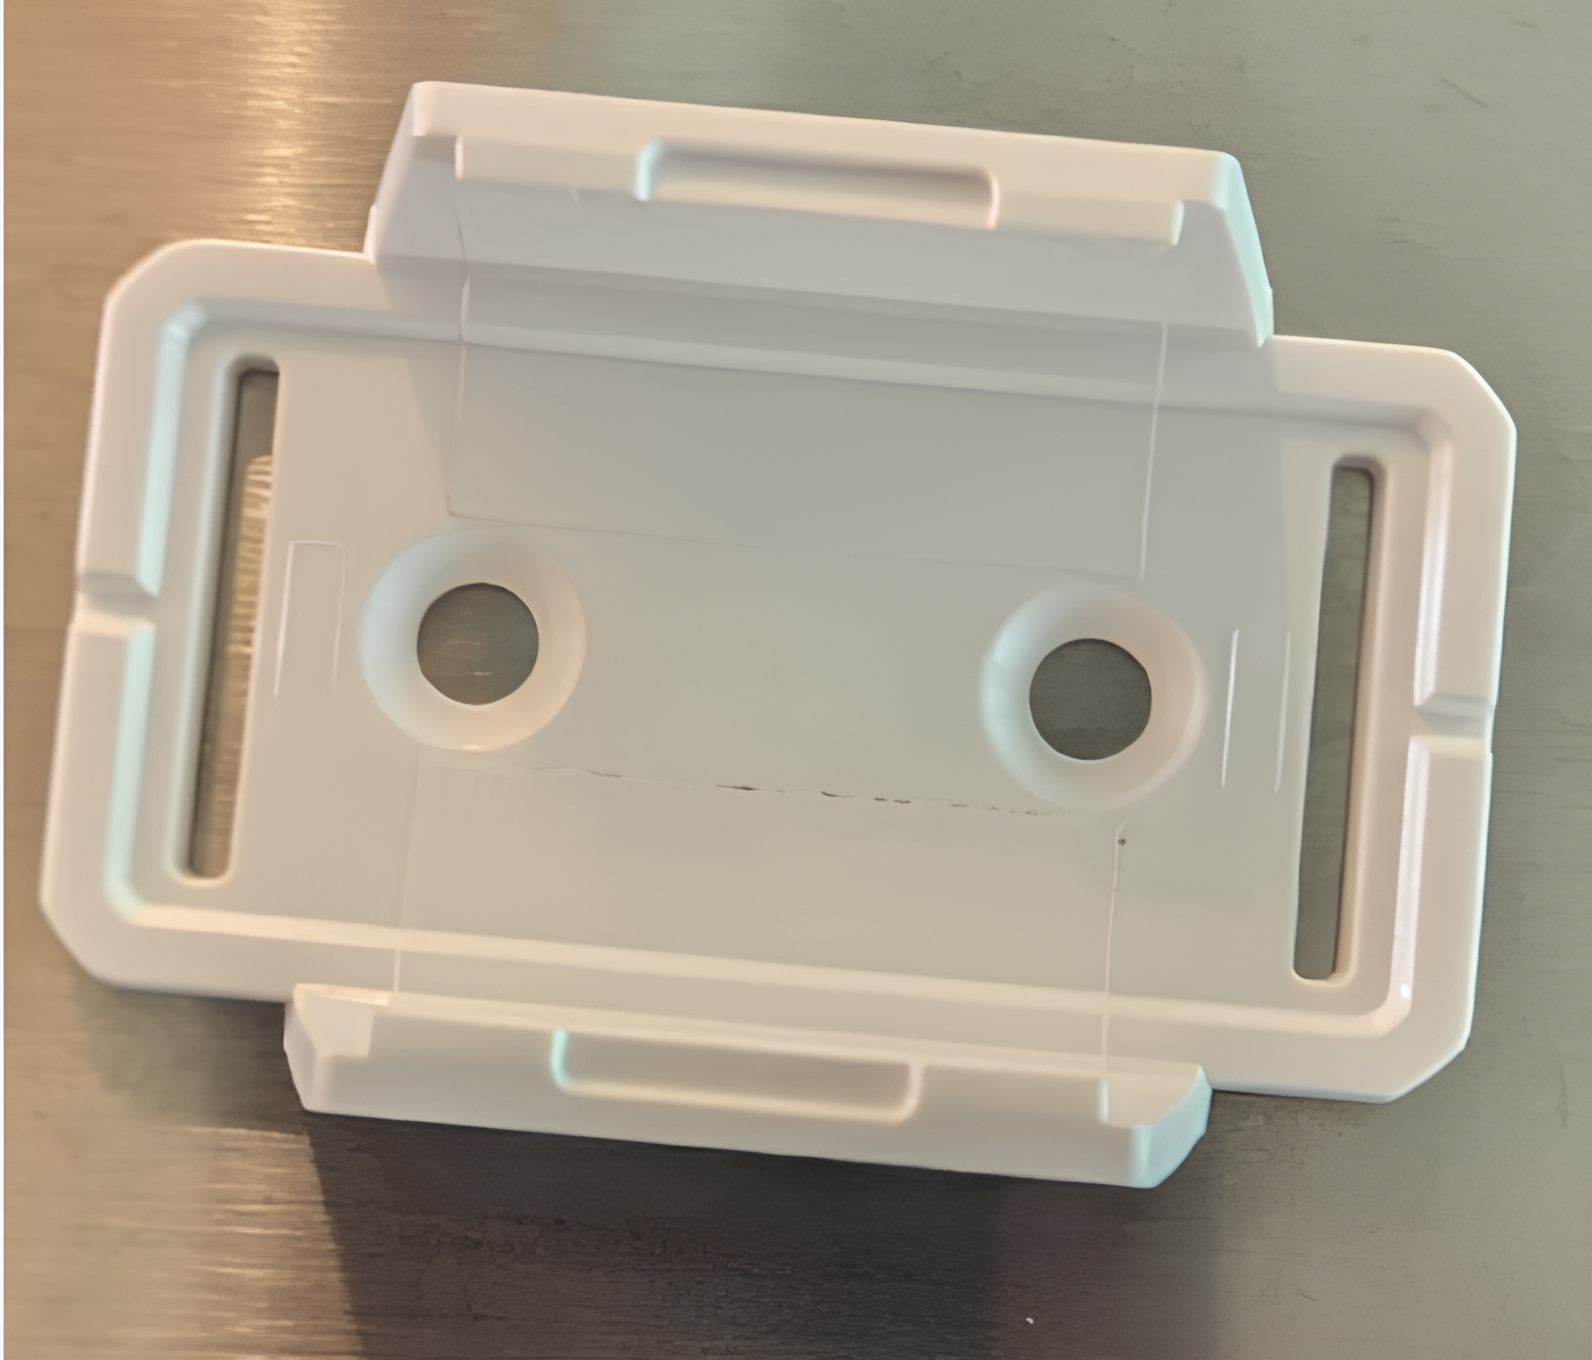 |
NOTE!
The total combined weight of the GSatRancher and mounting clip components is 33.78g (0.03378kg).
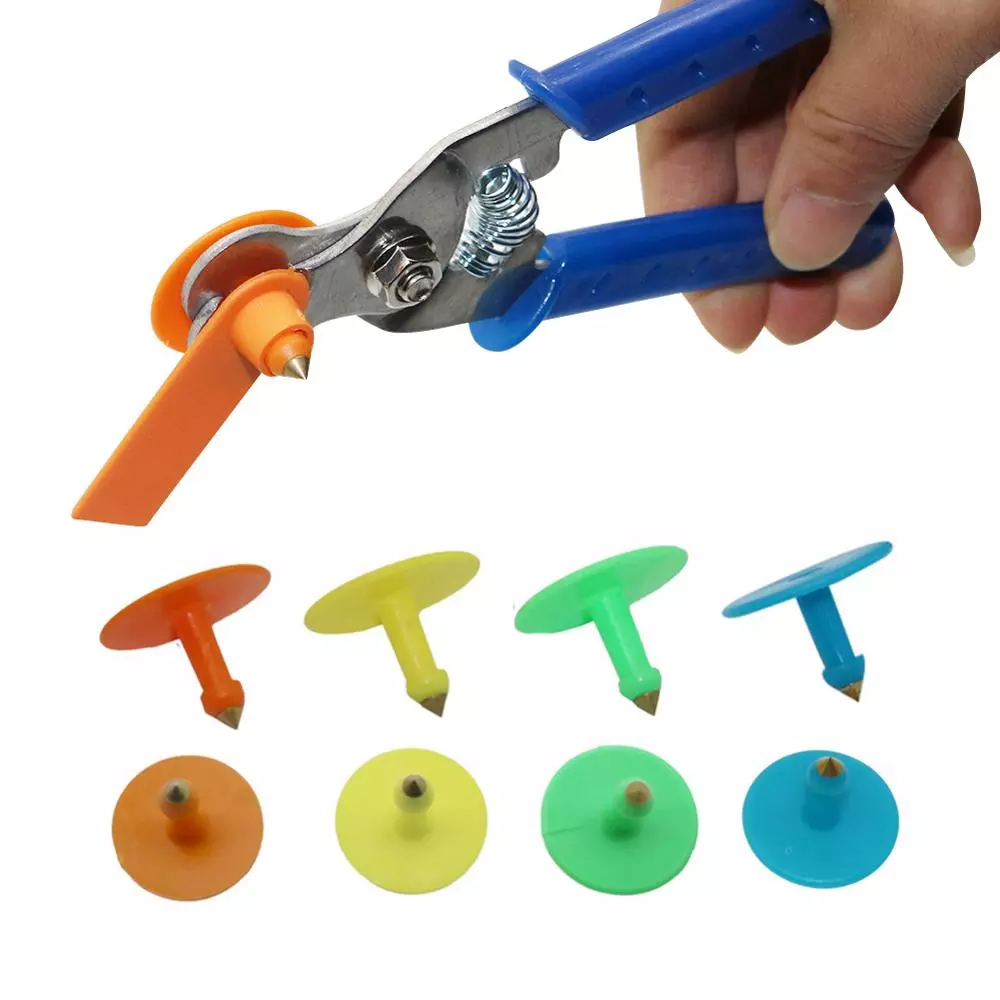
CAUTION!
Do not use plastic-tipped pins. Metal-tipped pins are required to maintain high retention rates.
Tools and Parts Required
Tools and parts not provided by GSE, but suggested for installation.
| Qty | Name | Photo |
|---|---|---|
| 1 | Crimping Tool | 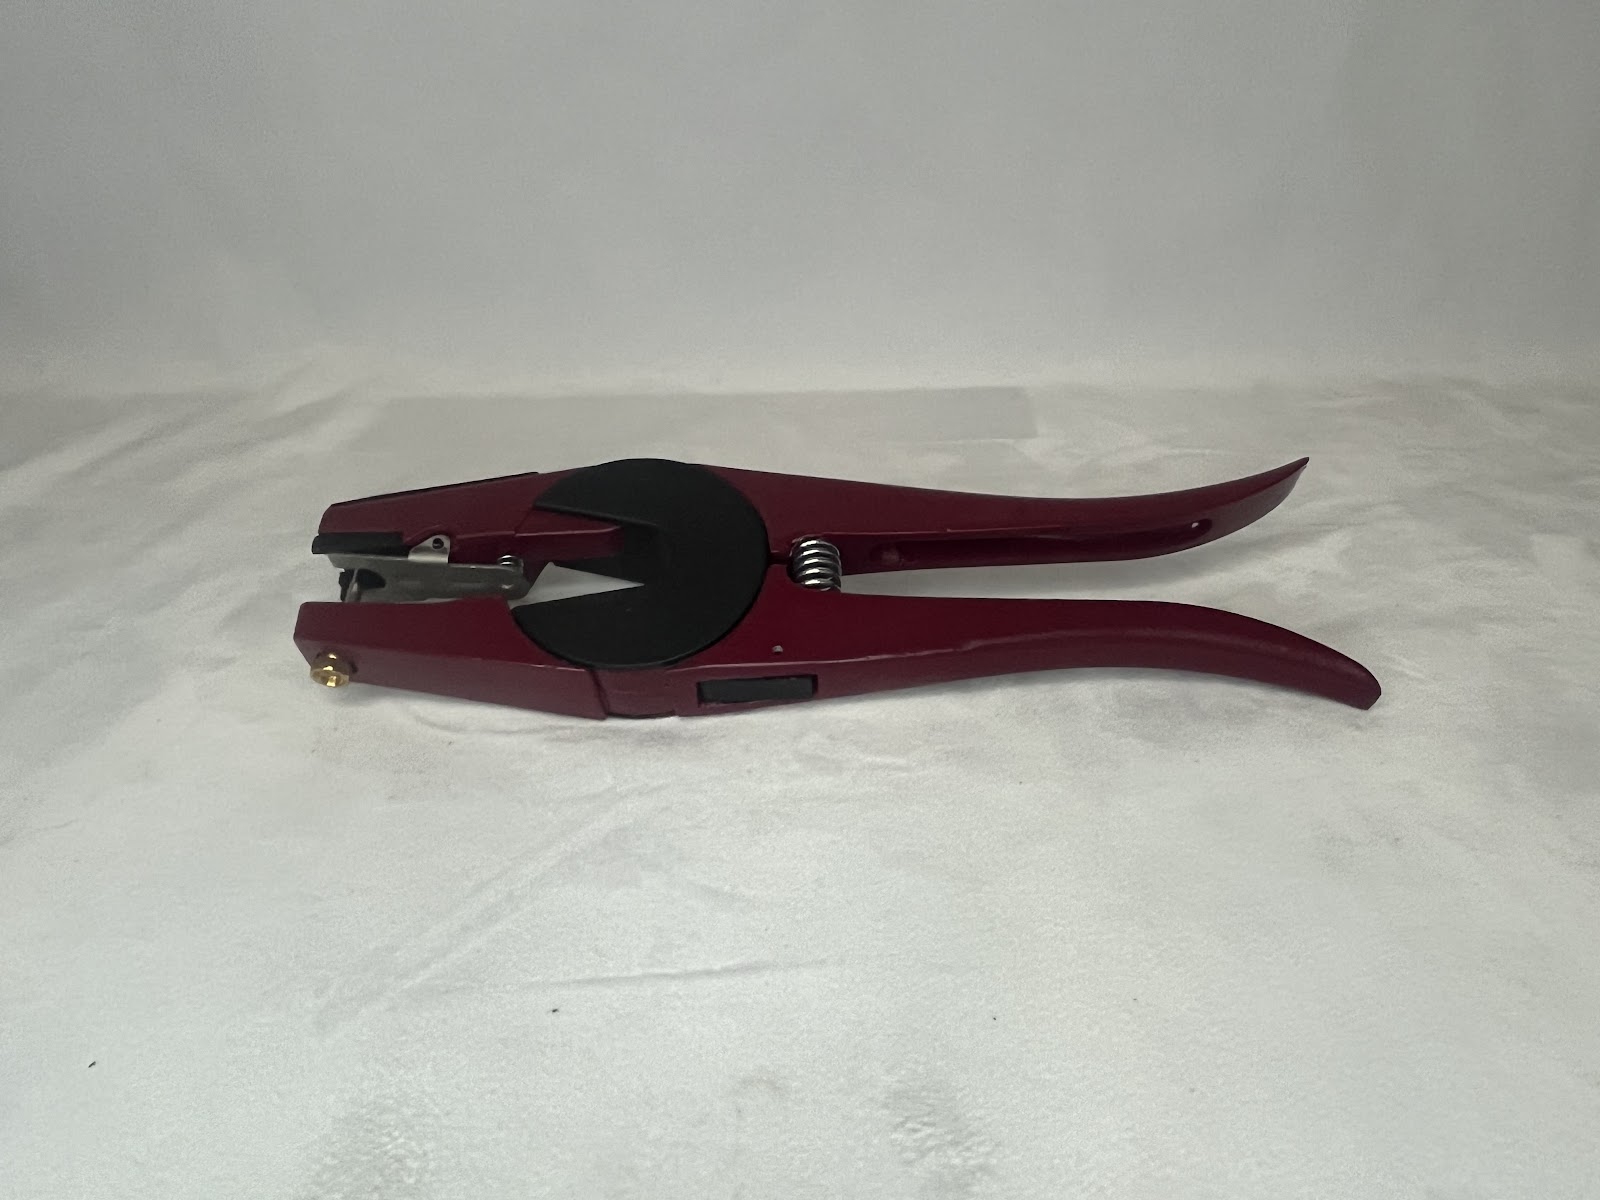 |
NOTE!
The Crimping Tool is not included with the product kit. The crimping tool (Allflex Universal Total Tagger or a compatible one) can be purchased readily locally or via online shops.
Ear Tags
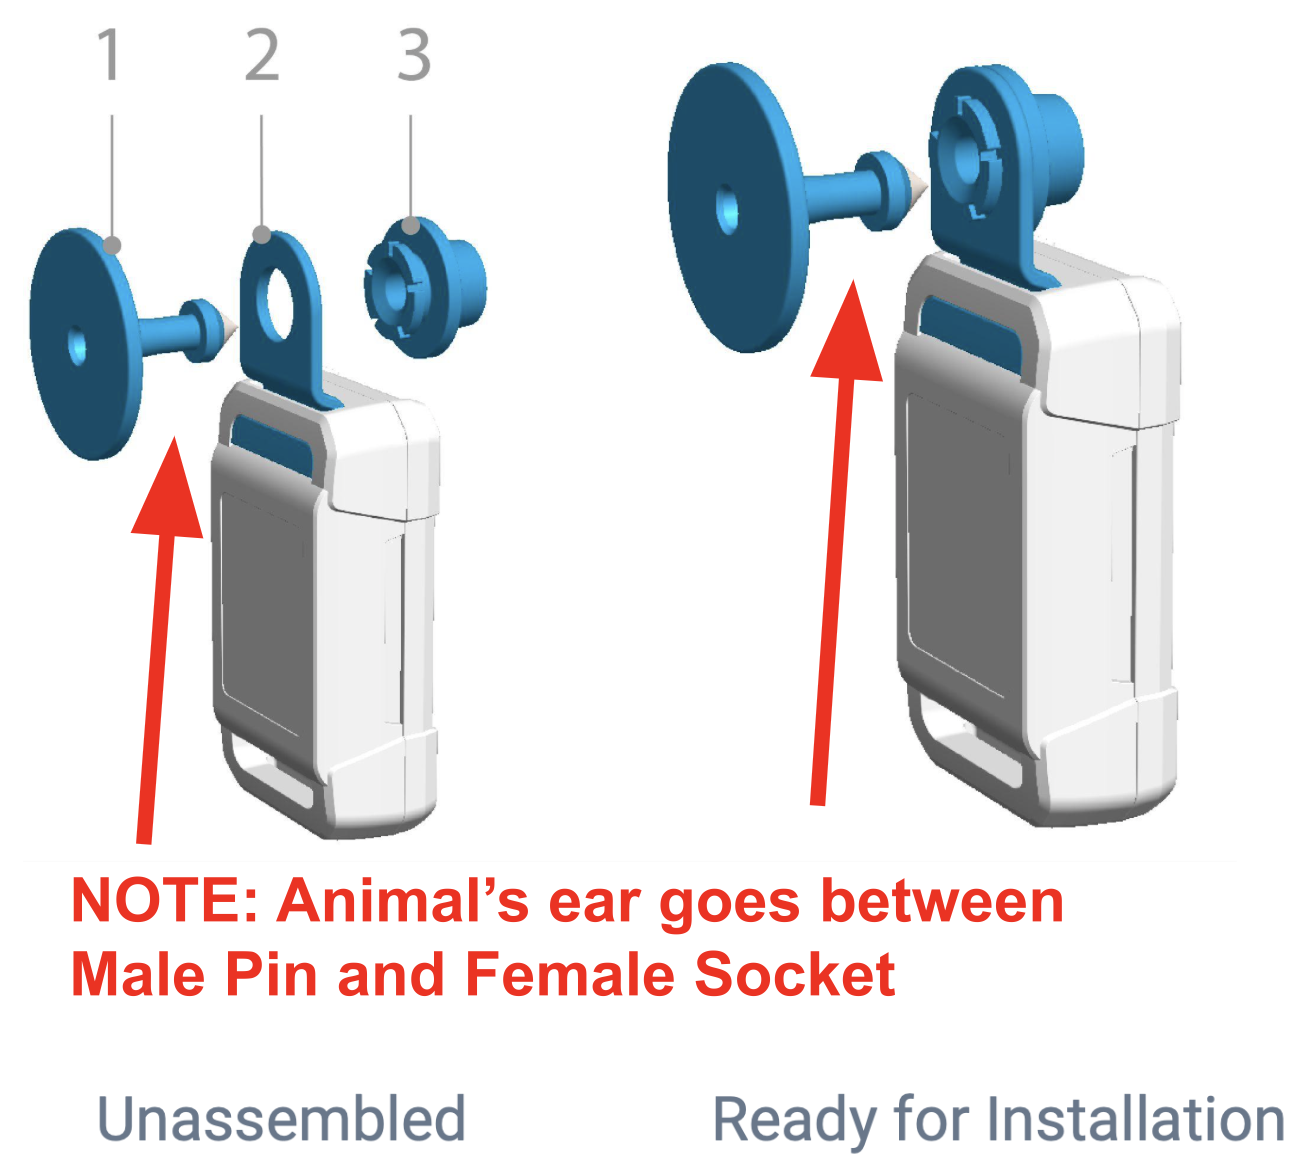
Note!
Ear tag components are clear plastic and not blue as shown in the example. Color is used in the computer-generated image to help the user clearly identify each component.
Components of the ear tag:
- Male Pin: Pin for piercing the ear
- Mounting Strap
- Female Socket: Must be mounted in Mounting Strap #2
Note!
The flat side of the female socket is facing the back of the GSatRancher, and the raised side is facing the solar panels.
Tools necessary for installation:
- Crimping Tool
- Allflex Universal Total Tagger
- (or) Most universal taggers will work
- GSatRancher
- GSatRacher Ear Tag Mount (3 parts)
Mounting Instructions
CAUTION!
Vets have indicated that piercing and rubbing can cause infection. Use proper disinfectant to clean the area on both sides of the ear and the ear tag components prior to application.
CAUTION!
The application site must be free of foreign debris before placing tags on the animal. Free air space is critical for proper healing and retention. Inspect the placement after tagging to ensure there is sufficient space between the ear and the tag.
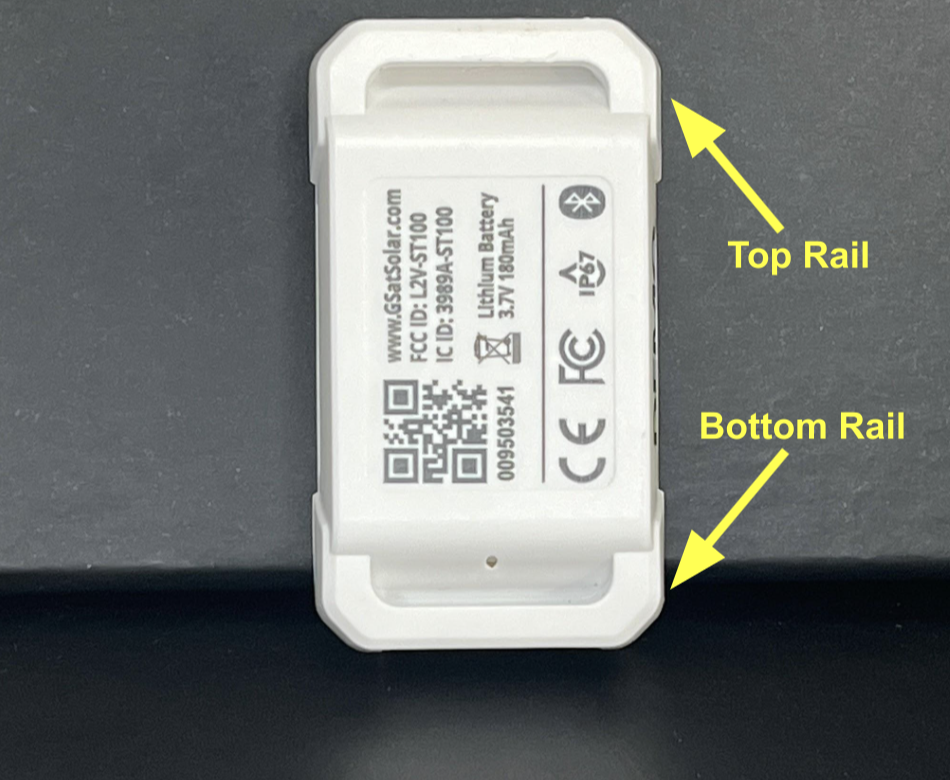
STEP 1: Pull the mounting strap through the top rail of the GSatRancher
The mounting straps are difficult to pull through at room temperature and need to be temporarily soaked in warm water before attaching to the GSatRancher. Use the following steps:
- Set up a pot of warm water (70°C or 160°F). Don't use hot/boiling water; it will deform the mounting strap above 90°C or 190°F.
- Thread a string/cord through the mounting strap. Use a 1mm cord or something similar for this process.
- Drop the mounting strap into the warm water for 30 seconds.
- Thread the ends of the string through the top rail of the GSatRancher.
- Pull the string through the top rail, and the mounting strap will pull through it quite easily.
- Remove the thread from the mounting strap.
Using dish soap to attach the mounting strap to the GSatRancher is an option as well:
- Thread a string/cord through the mounting strap. Use a 1mm cord or something similar for this process.
- Apply a drop of dish soap or dishwash liquid to the mounting strap.
- Thread the ends of the string through the top rail of the GSatRancher.
- Pull the string through the top rail, and the mounting strap will pull through it quite easily.
- Rinse off the mounting strap with room-temperature water and remove the thread from the strap.
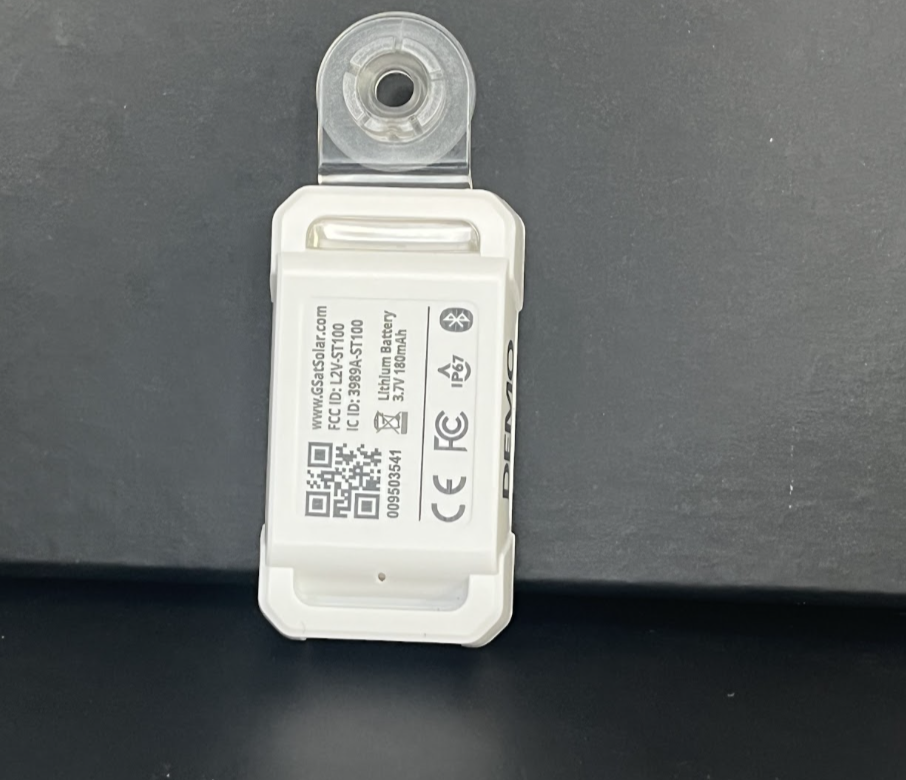
Slide the round end of the mounting strap under the top rail of the GSatRancher.
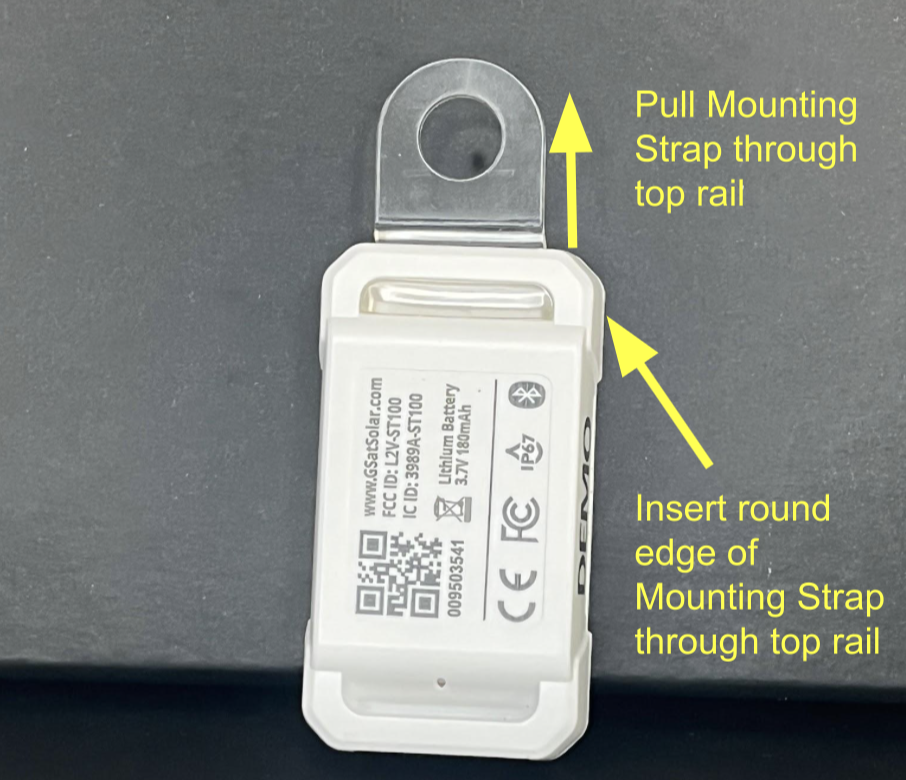
Firmly pull the mounting strap through the top rail of the GSatRancher until you hear a click or snap.
STEP 2: Firmly insert the flat backside of the female socket through the mounting strap.
CAUTION!
If the female socket is not properly mounted, the GSatRancher can and likely will fall off the male pin. Make sure this step is completed properly.
Make sure the Flat Side of the Female Socket is facing the backside of the GSatRancher (away from the solar panels).
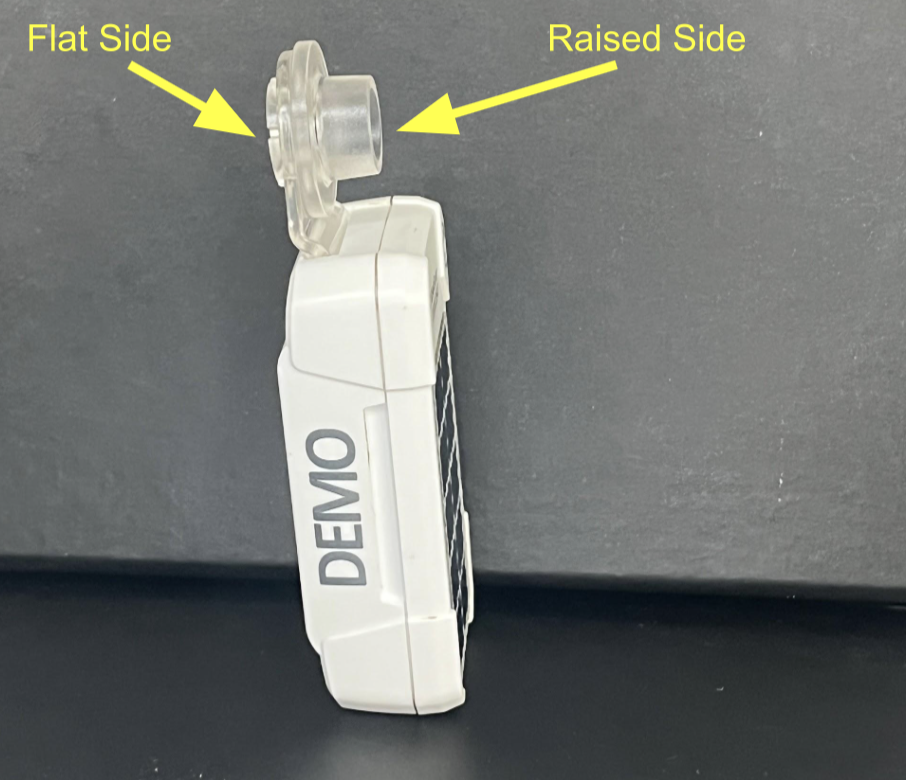
If the Female Socket is installed backwards the GSatRancher will not be properly mounted and will likely fall off.
STEP 3: Attach the ear tag components to the crimping tool.
- To load, depress the spring clip and insert the female socket connected to the mounting strap and GSatRancher. Ensure that the raised portion of the tag is placed in the open portion of the jaws. The solar panels should be facing down.
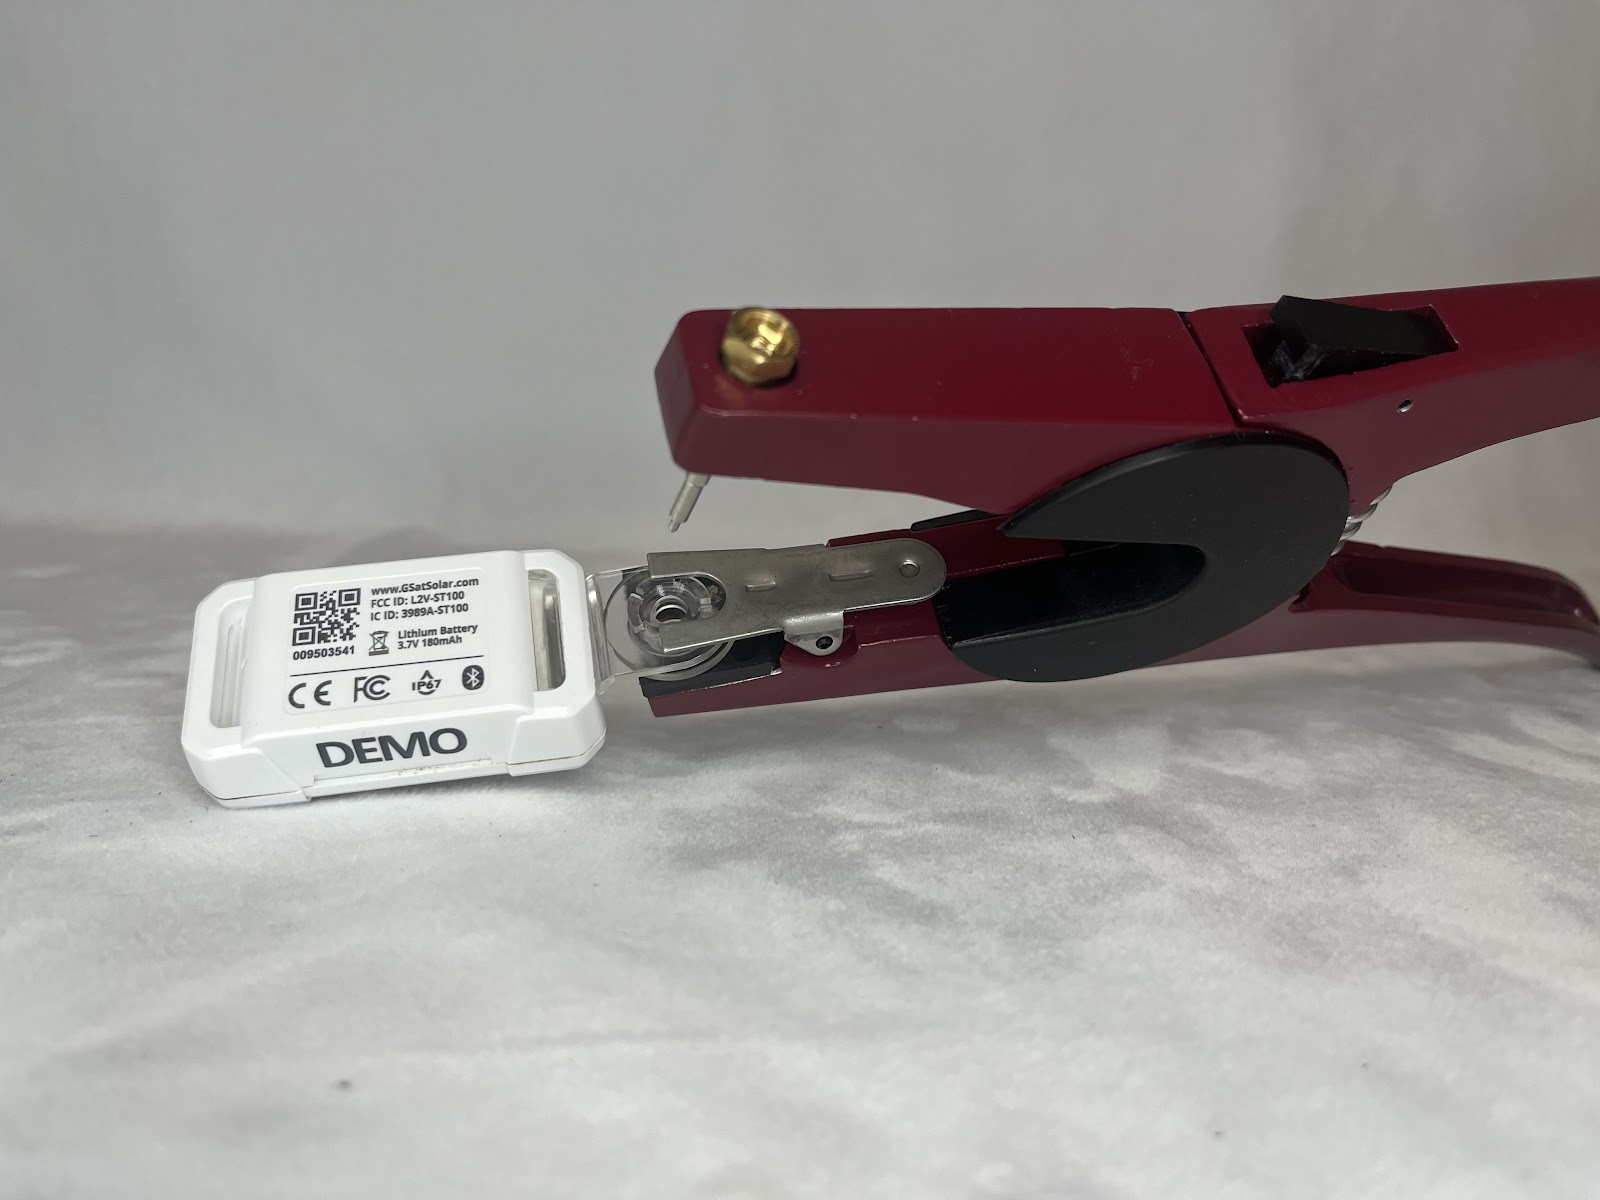
- Slip the Male Pin completely onto the blunt applicator pin. Squeeze the jaws together lightly to ensure the Male Pin shaft is in line with the Female Socket.
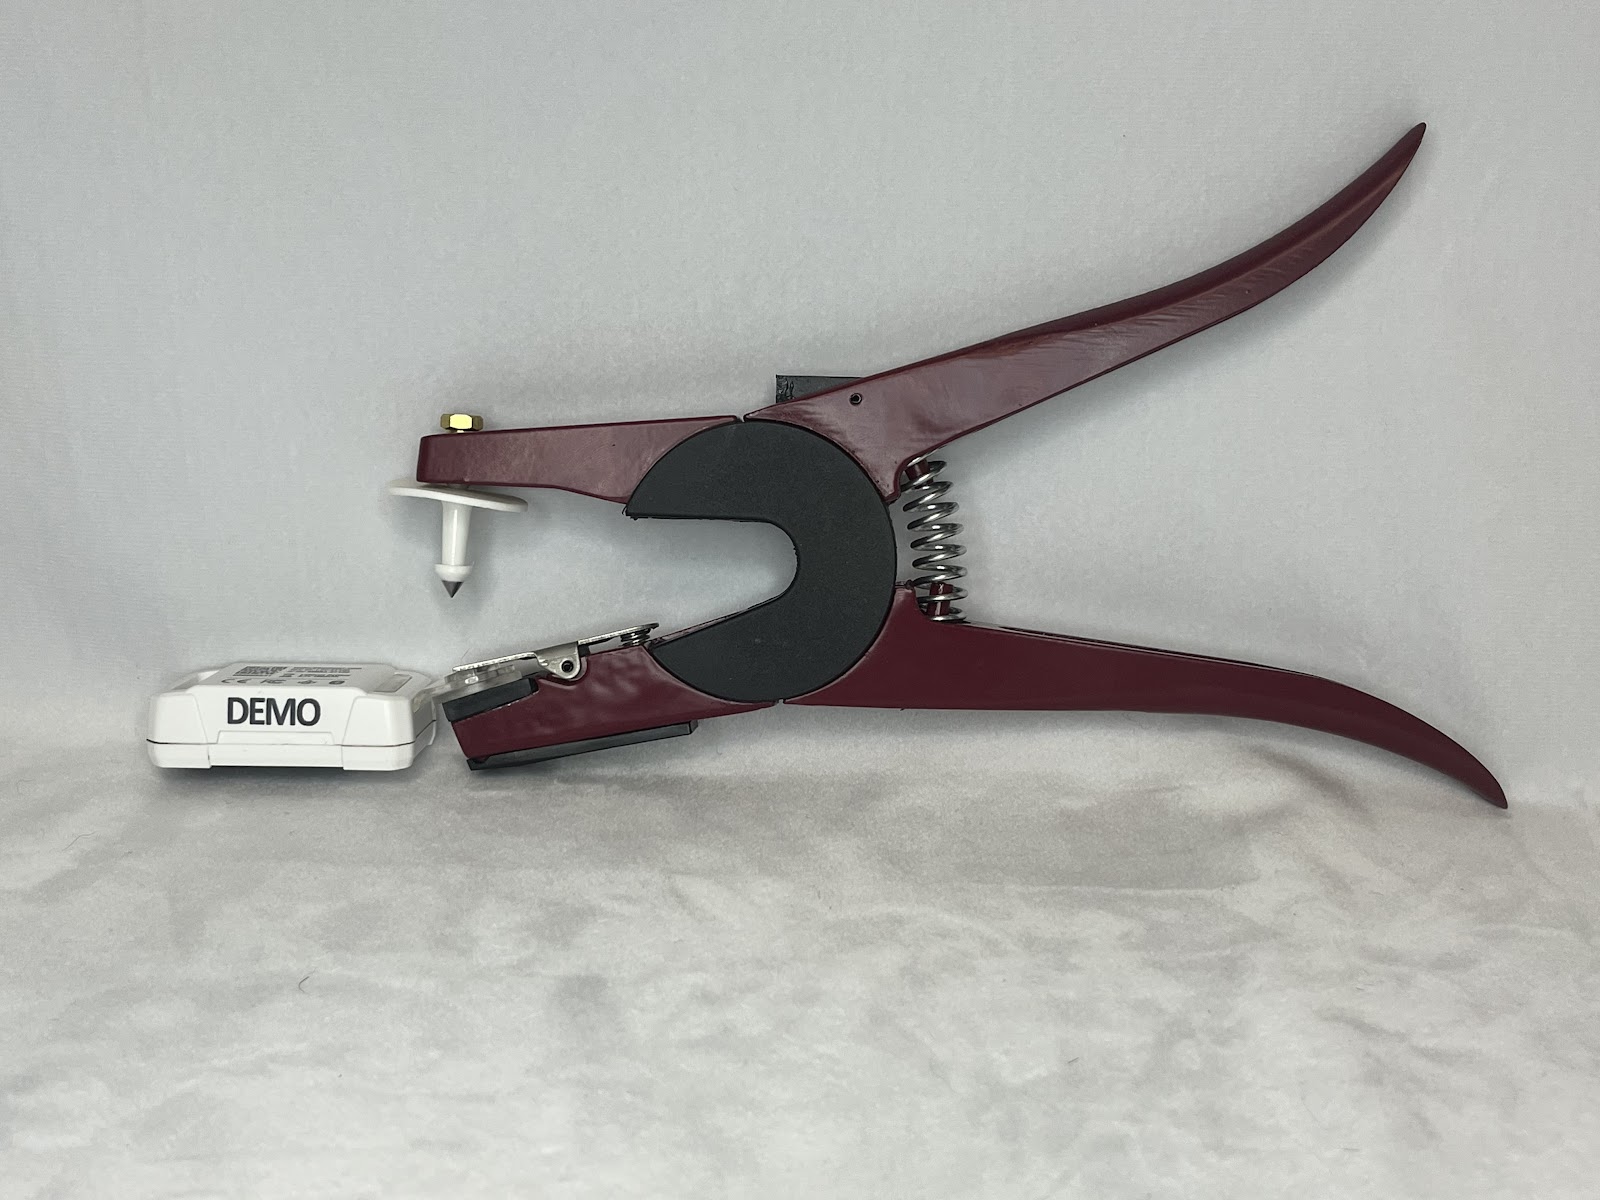
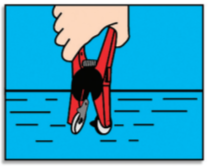
- Dip the jaws of the applicator holding the tag into an antiseptic or disinfectant solution.
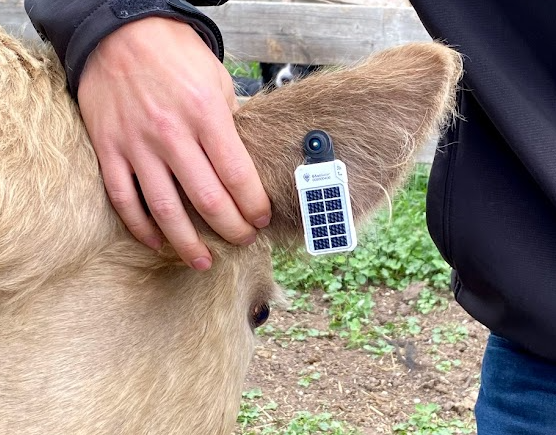
STEP 4: Mount the tag onto the animal's ear.
Note!
A fake ear has been used in some of the images for demo purposes.
The tag should be placed vertically, in the middle of the ear, between the two cartilage ribs and 2/3 from the outside edge of the ear, 1/3 from the head. (Application too deep in the ear is not recommended).
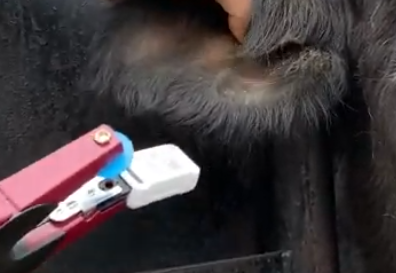
Make sure the GSatRancher is on the outside of the ear with the solar panels facing toward the sun. See additional images below
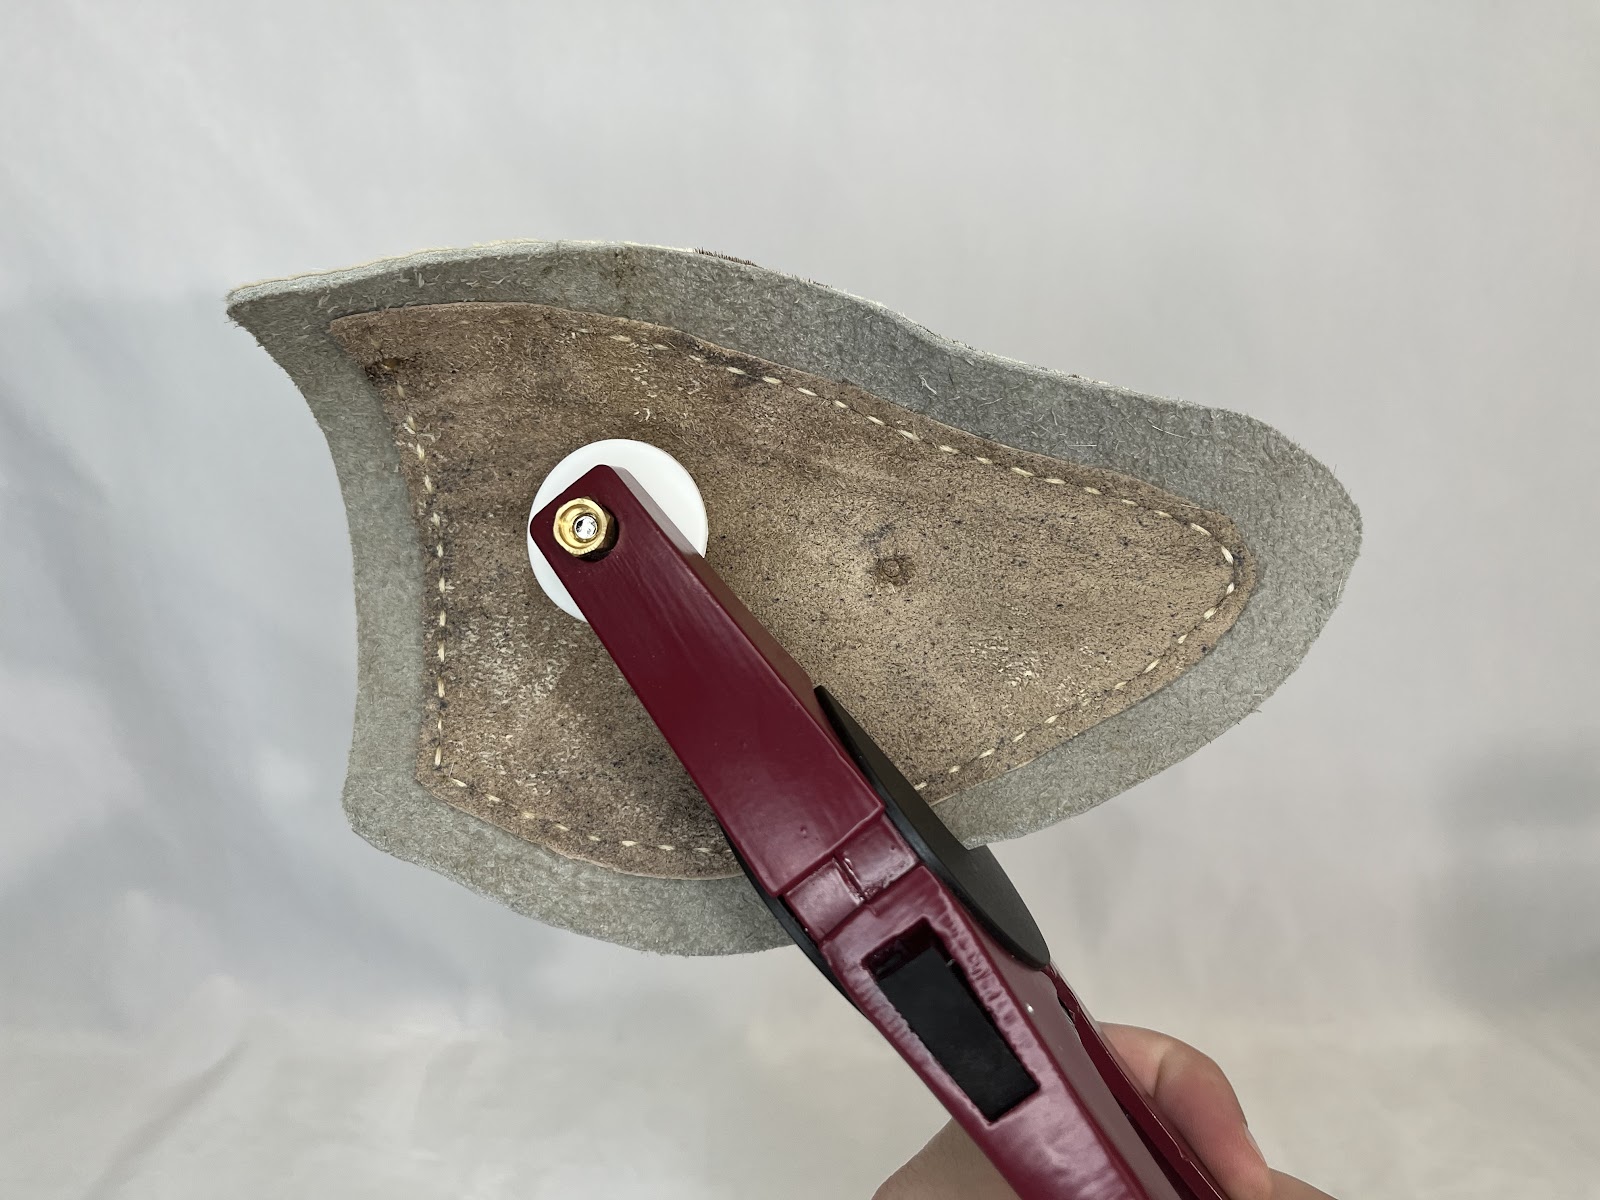
The female portion of the tag should be on the outside of the ear with a tag application.
Note!
The color of the tag is only shown for instructional purposes and is typically clear. The raised portion must be down, facing away from the solar panels on the GSatRancher.
To operate the crimping tool:
- Holding the crimping tool with the tag in place, squeeze the handles together.
- Ensure that the male pin shaft is in line with the female socket.
- The tool must be securely in place to prevent the male pin from releasing.
Two-Pin Ear Tag
Before Mounting
Gather Components Ensure you have all necessary components for each tag:
- 1 GSatRancher Device
- 1 Mounting Clip
- 2 Male Pins
- 2 Grommets (Female Sockets)
Prepare for Application
- Disinfect both the mounting site and all tag components, especially the male and female pins.
- Confirm you have a safe, species-appropriate applicator for your animals.
- Review the quick start card to ensure the device is charged and reporting before mounting.
IMPORTANT!
Do not mount a GSatRancher device on an animal without first confirming it is charged and reporting the result. Contact your provider if you need troubleshooting.
Mounting
Animal Preparation Place the animal in a head chute, or have a veterinarian or trained professional sedate the animal.
Disinfect Thoroughly disinfect the application site on the ear and all tag components.
Placement Identify the ideal placement for the 2-pin ear tag:
- For cattle: Mount in the center of the ear, approximately one-third of the way from the base
- For other species: Consult a veterinarian for the best placement
Attach the 2-Pin Ear Tag:
Mount the First Male Pin & Mounting Clip
- Insert the Applicator Pin into the first male pin, then guide it through the Mounting Clip on the Allflex Mounting Applicator
- Depress the spring clip on the applicator and insert the Grommet (Female Socket)
- Mount the clip onto the animal's ear so the clip is positioned on the side where you want the GSatRancher device to sit
Mount the Secondary Pin
- Place the Secondary Pin on the Allflex Mounting Applicator by inserting the Applicator Pin into the stationary Male Pin
- Depress the spring clip on the applicator and insert the Grommet (Female Socket)
- Insert the Secondary Pin through the top of the hole in the Mounting Clip, ensuring both Grommets are on the opposite side
IMPORTANT!
Incorrectly attaching the female sockets can cause the GSatRancher device to become loose or fall off.
- Attach the GSatRancher device to the mounting clip by firmly pressing it until it snaps in place. Gently pull on the GSatRancher device to ensure it is snug and does not come loose.
After Mounting
- Monitor the animal for several days after mounting to ensure the ear does not become infected
- The ear may take several weeks to heal completely. Consult with your animal's veterinarian about signs of infection and proper ear treatment
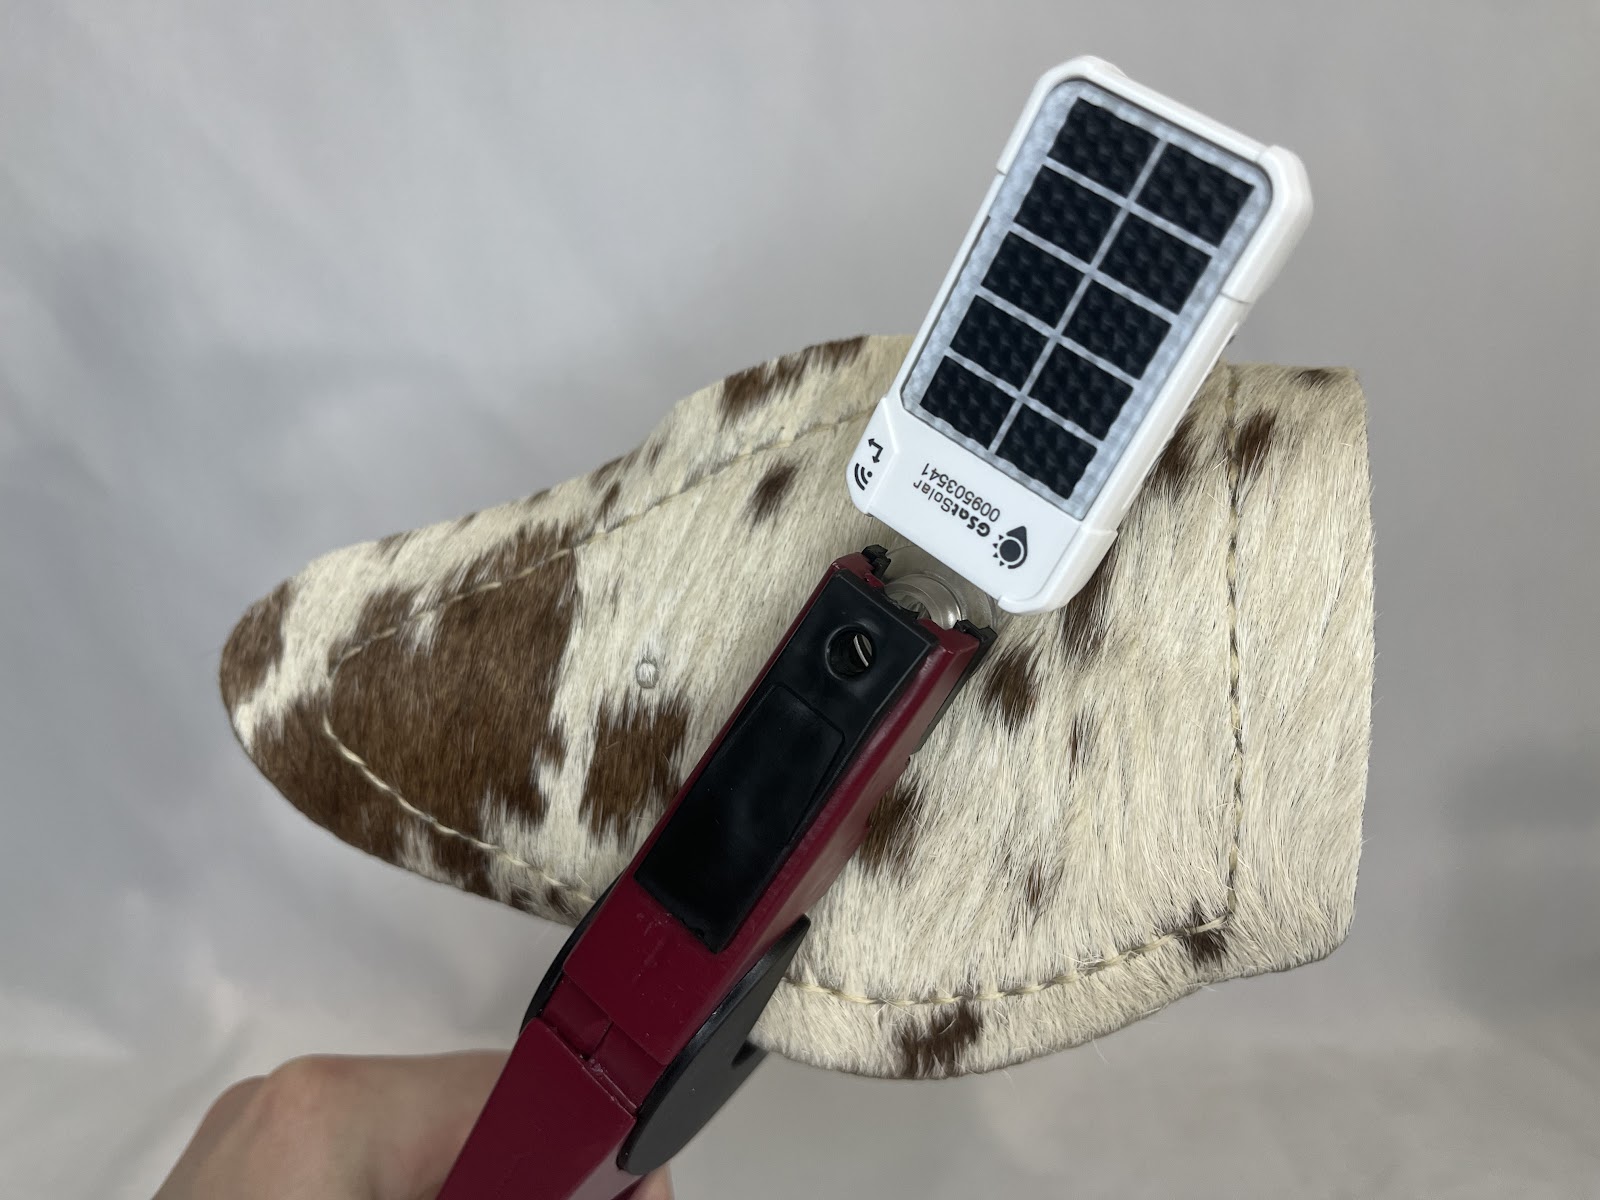
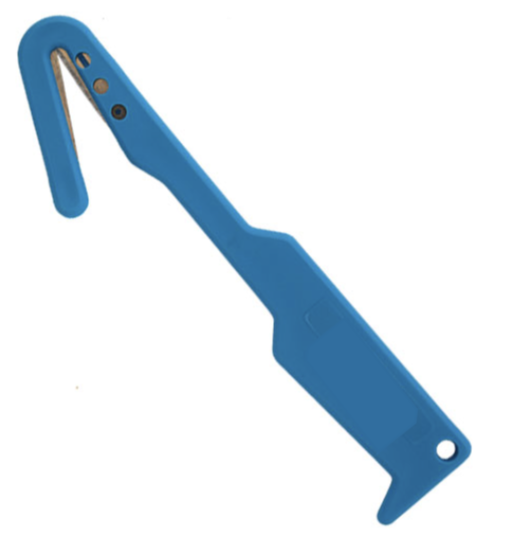
Ear Tag Removal
CAUTION!
Use the tag removal tool that has a rubber "boot" or another attachment to grab the tag. Ear tags can be very sharp and are not suitable for bare hands.
Note!
Use an ear tag removal tool which has a plastic hook and guarded blade designed to prevent injury to the animal.
Carefully slip the hook between the male side of the tag and the animal's ear.
Place the hook around the stem of the tag.
Gently pull on the hook while moving it up and down in a twisting motion. Pulling too hard can tear the animal's ear.
Let the blade slice through the stem.
Apply antiseptic to the hole in the ear to clean it and prevent infection.
Collar
Note!
Although the GSatRancher is lightweight, a heavier counterweight should be attached to the opposite side of the strap/collar to ensure the solar panel naturally stays facing the sun. If this is not done, the GSatRancher will eventually shift underneath the animal, causing the solar panel to point away from the sun.
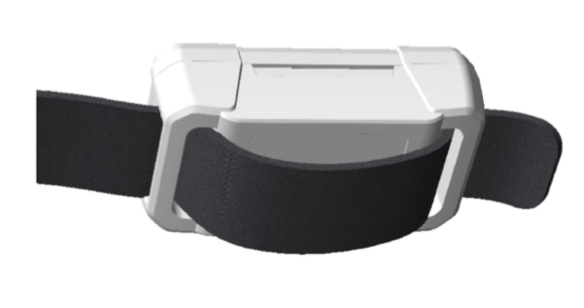
Primary Strap/Collar Option
Insert a collar through the rails on the top and bottom sides of GSatRancher, as shown in the diagram. A second option is to use two nylon straps, one connected to each rail, and rivet to a larger collar to increase the strength.
Modular Mounting Clip The clip can be mounted to a heavy collar using rivets. To attach, press the GSatRancher into the clip until you hear a firm snap on both sides. To detach, use the indent in the clip arms to release one side of the GSatRancher, then release the other side.
Modular Mounting Clip Dimensions:
- Length: 53.6 mm
- Width: 35.5 mm
- Height: 14.5 mm
Note!
The clip is designed to hold the GSatRancher very firmly. It will take significant force to remove the GSatRancher.
Attach counterweight to opposite end of the strap/collar.
Attach the strap/collar to the animal, making sure it is not too tight. It should be snug but not restrictive.
For a rivet system, the body should be snug to the collar. For a strap/collar system, a little slack may be necessary.
Connecting Strap Option
Note!
Where the connecting strap is riveted, make sure the body is snug to the collar. For a strap/collar system, a little slack may be necessary.
If you use the strap design for an application that will exert a lot of force, use a stronger strap/collar and rivet the smaller strap to the larger strap to increase its strength.
STEP 1: Cut two small straps that are long enough to wrap around the rails and connect to the primary strap/collar.
STEP 2: Carefully measure the location of the connecting straps on the primary strap/collar and cut two holes.
STEP 3: Insert the bolts from the bottom side of the primary strap/collar through the connecting straps and tightly secure the nuts on the top side. Washers are suggested to prevent the strap/collar from wearing out over time.
Note!
Ensure the GSatRancher is securely fastened to the primary strap/collar. It should not be excessively tight, as this may cause the secondary straps to tear over time. However, allowing too much room can also be a problem, as it may enable the animal to get snagged on a tree branch or a pointy object.
Note!
If using bolts, ensure the bolt is inserted from the underside of the primary strap/collar. For a rivet system, the body should be inserted from the underside of the primary strap/collar with the mandrel attached from the outside.
STEP 4: Attach the strap/collar to the animal, ensuring it is neither too tight nor too loose.
CAUTION!
It should not be extremely tight, as this can cause injury to the animal. Animals have been known to get a foot or leg stuck in the loop. The intent is to secure the GSatRancher in a manner that is comfortable to the animal but difficult to remove by another animal or person. Check regularly.
CAUTION!
Some users have cut one side of the female socket so the unit can fit between the straps. This is not recommended.
Note!
If this is not done, then the GSatRancher will eventually shift underneath the animal, pointing either toward the head or the rear of the animal. This is not the best orientation for the unit and can decrease its performance. If a GSatRancher must be attached this way, it's best to use a separate collar and harness system.