Features
Using Advanced Features
Tracking
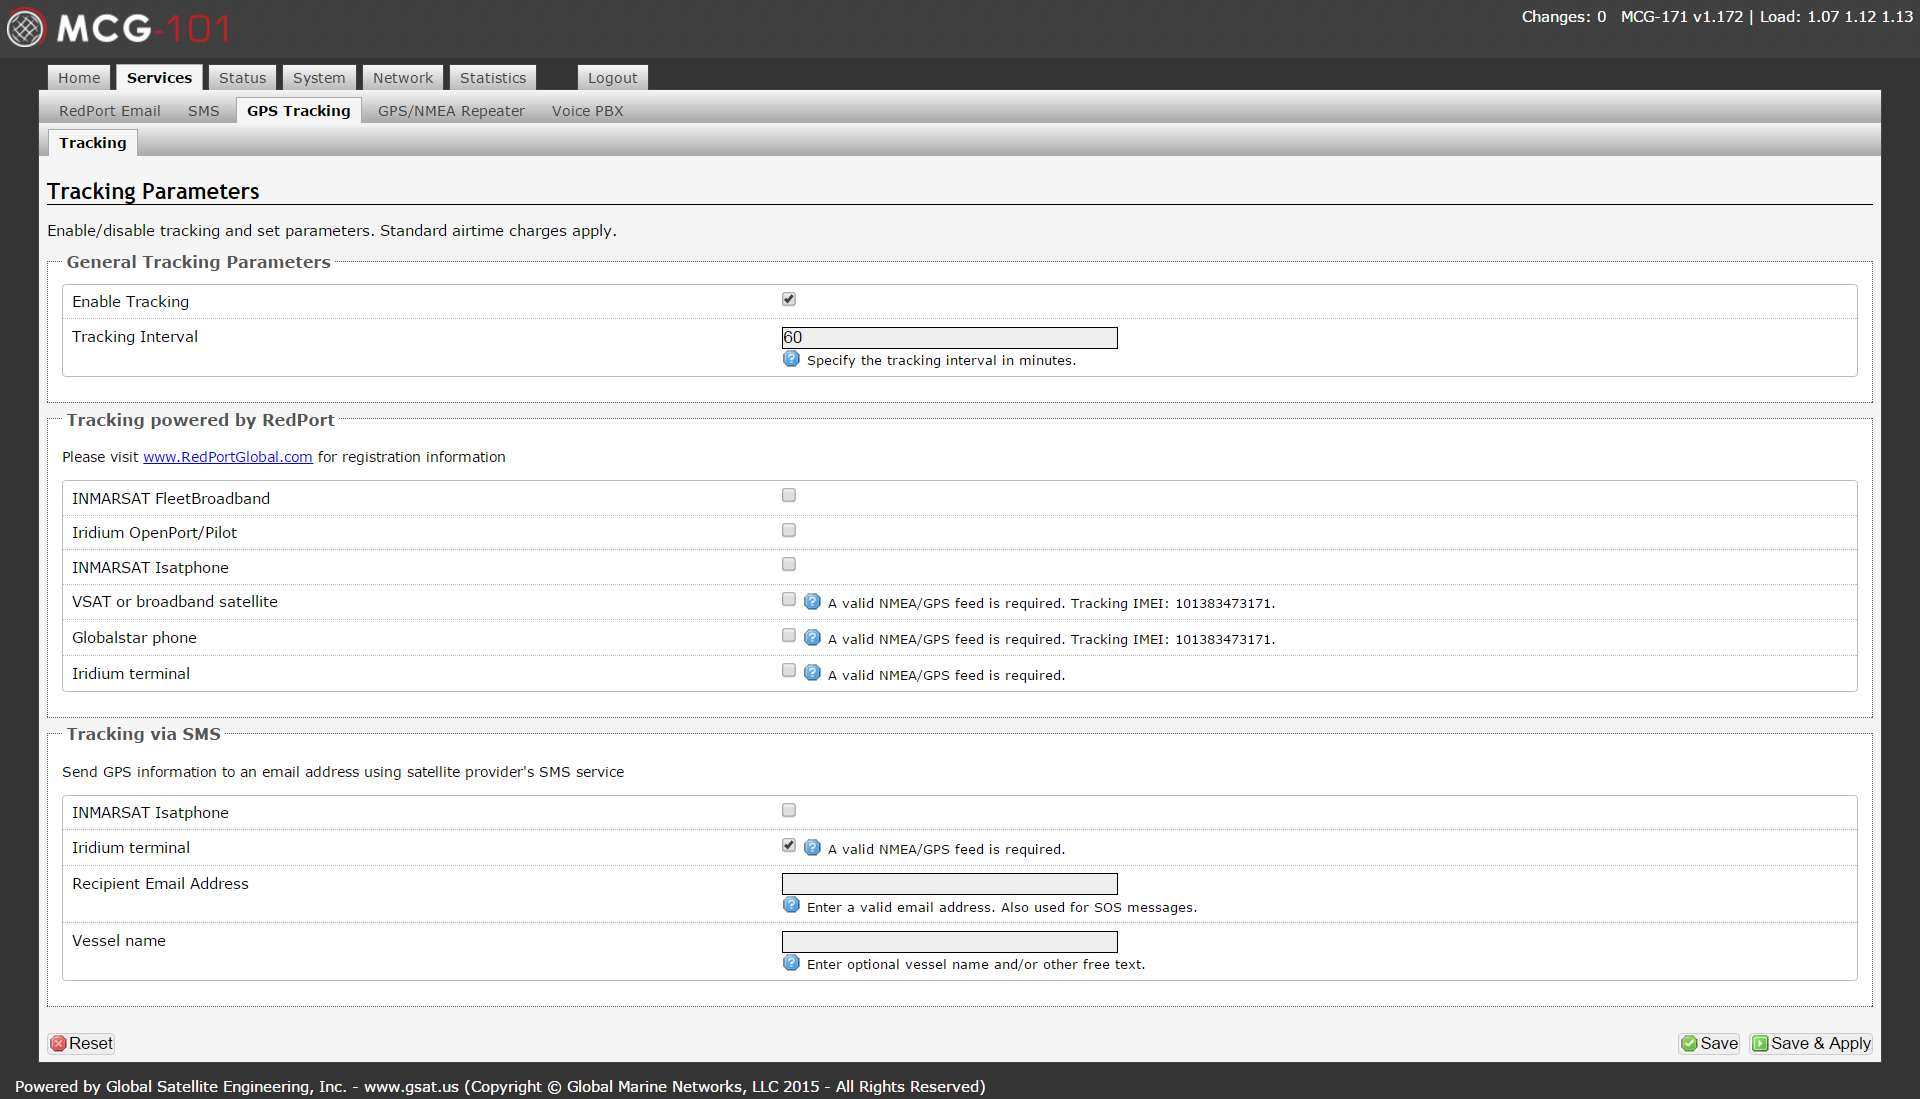
SBD to GSatTrack
To setup SBD position transmissions to GSatTrack, simply configure the tracking panel as shown below.
SMS to GSatTrack
To setup SMS position transmissions to GSatTrack, simply configure the tracking panel as shown below.
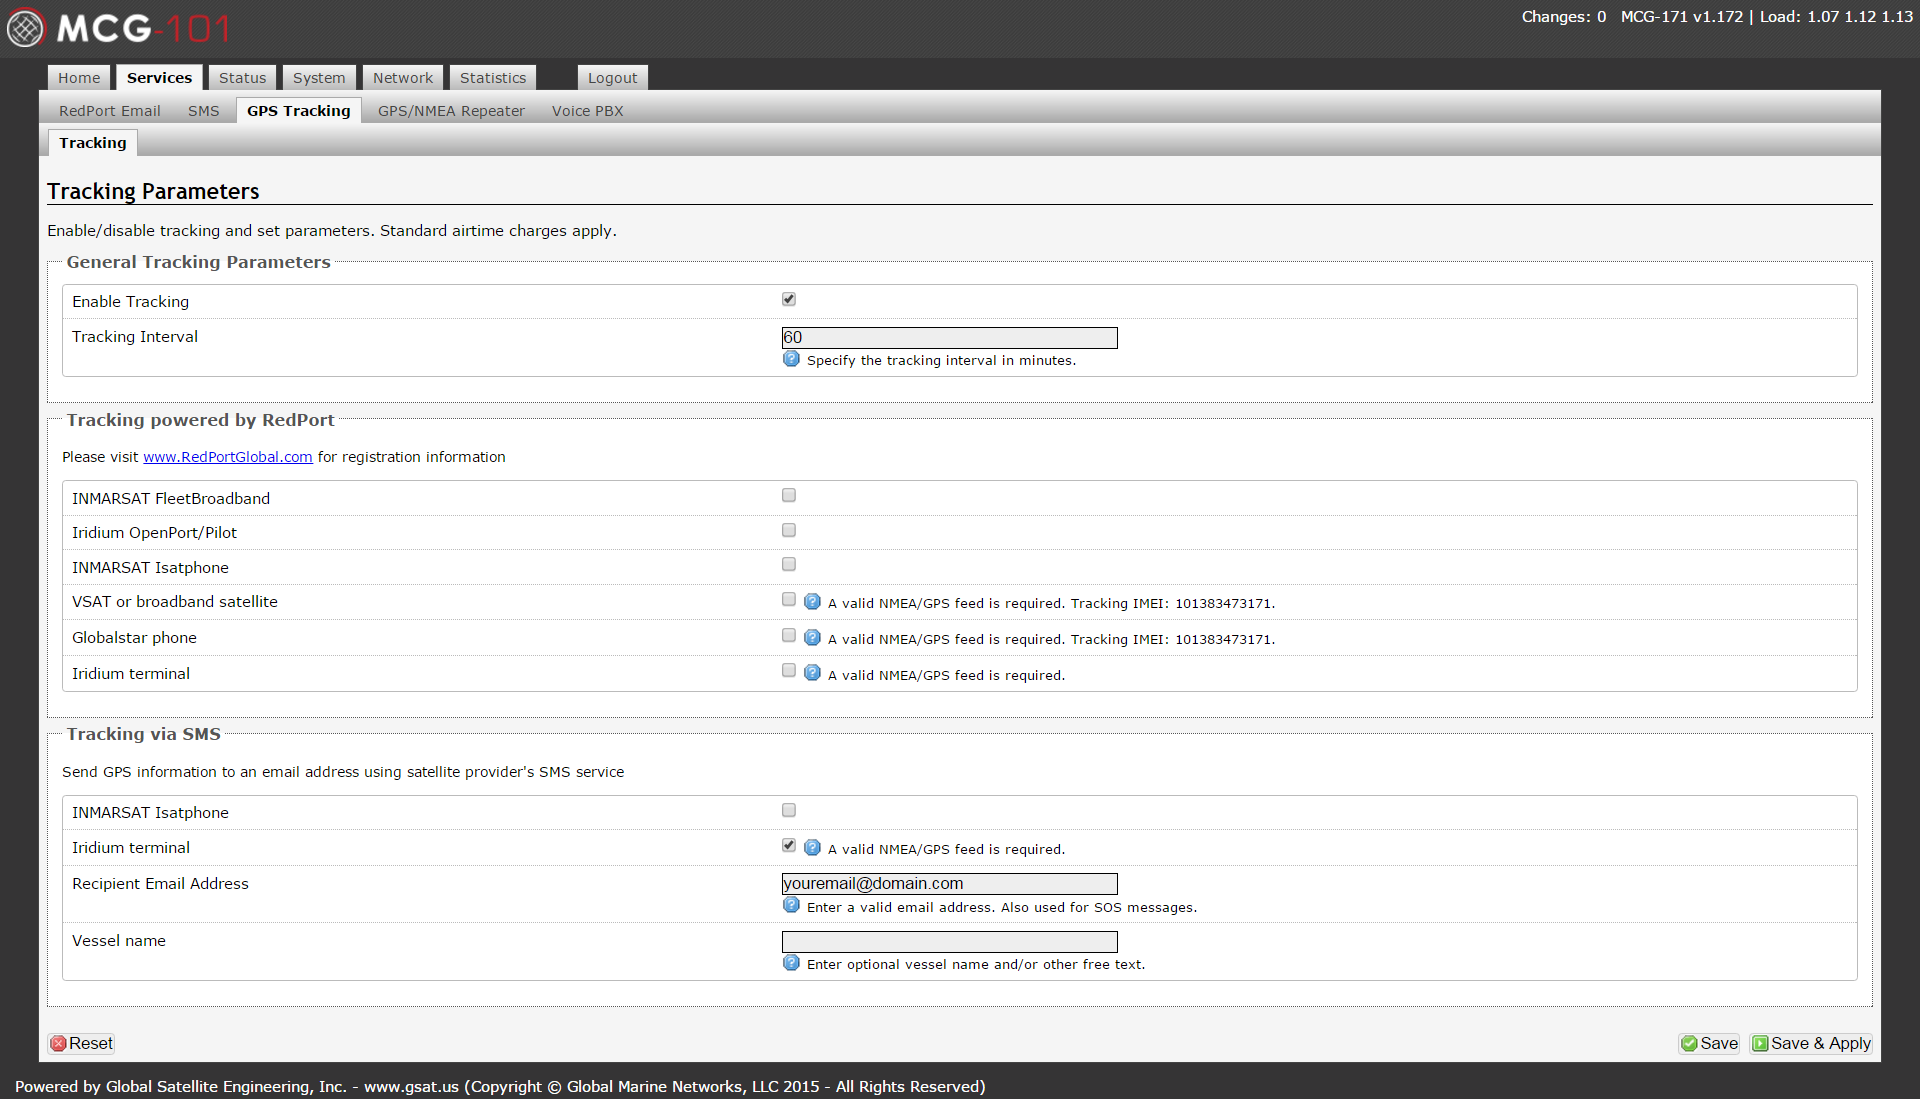
SMS to Email
To setup SMS position transmissions to an individual email address, simply configure the tracking panel as shown below.
Firewall Settings
Disabling Built-In Firewall
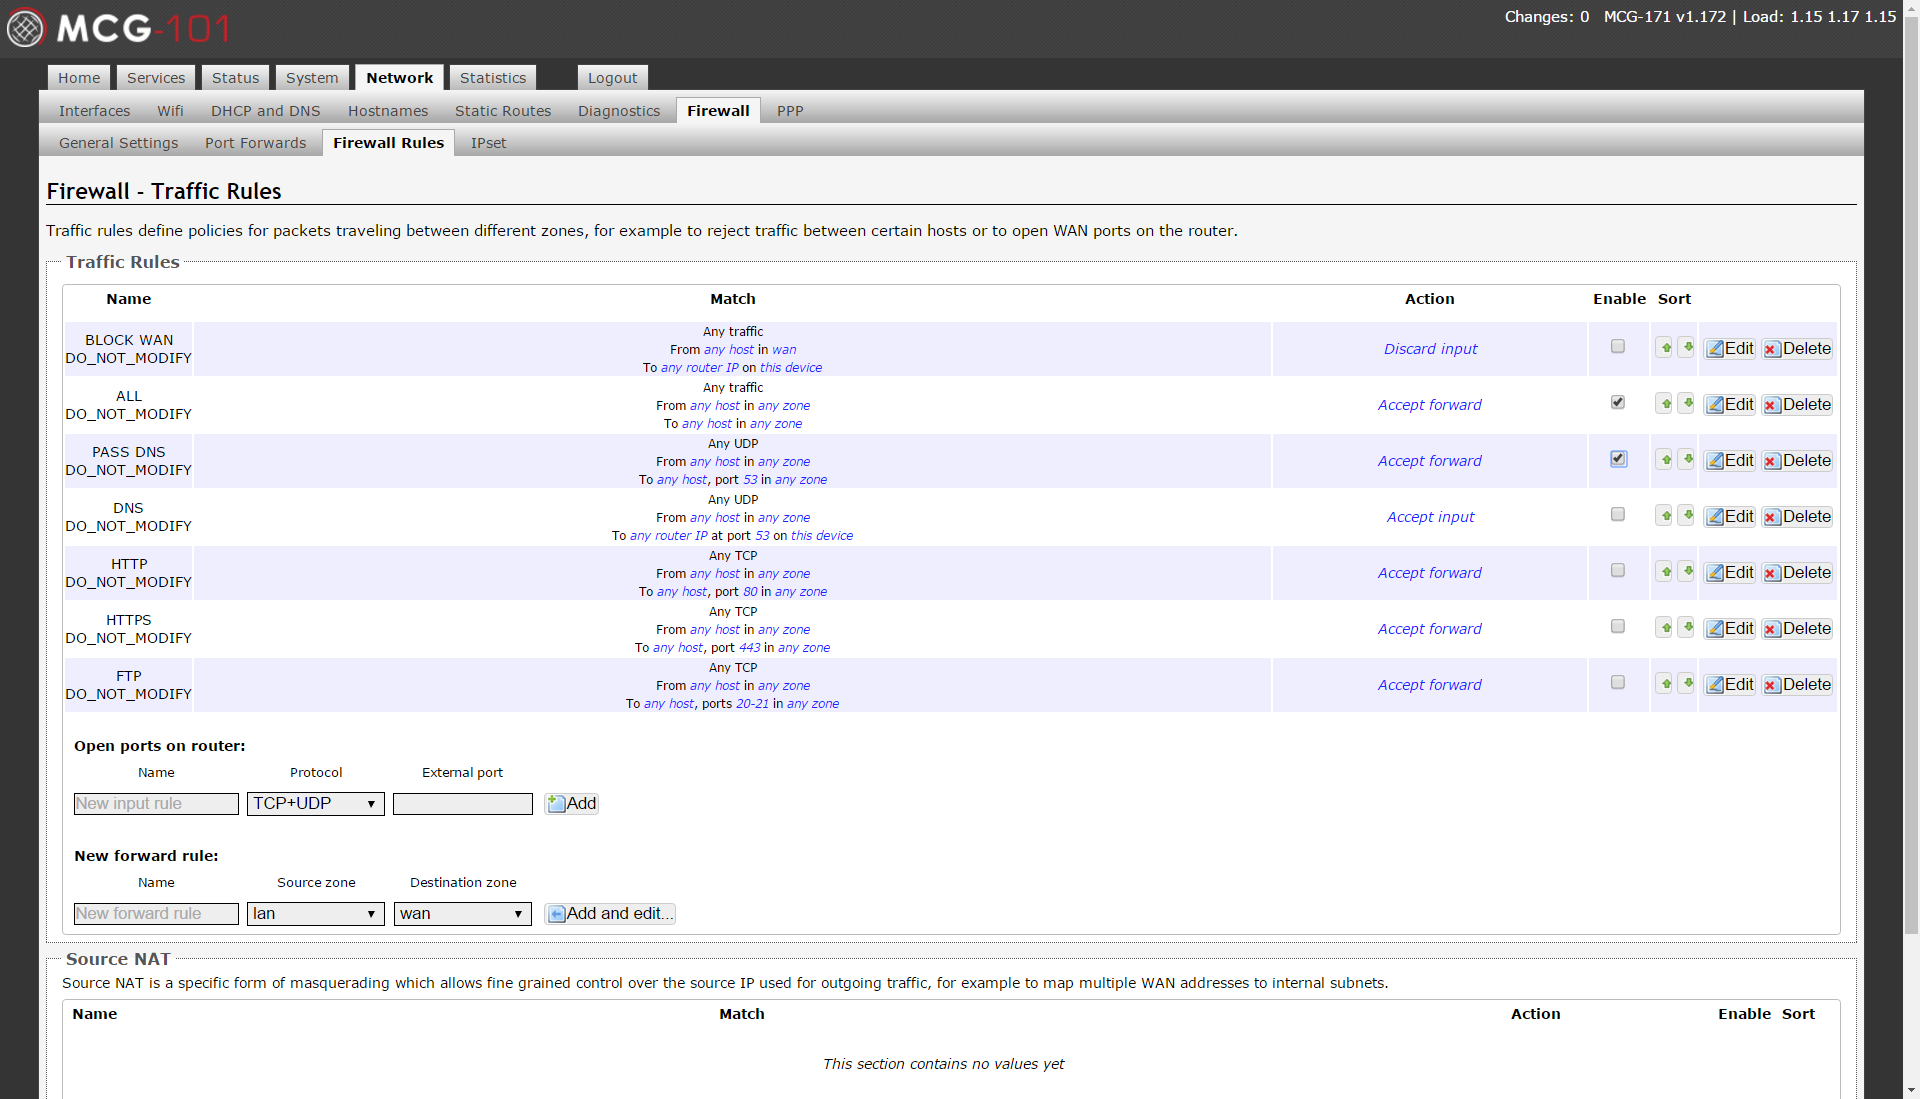
Network>Firewall>Firewall Rules - The firewall on the Aurora is set up to block all traffic to the internet except for XGate and XWeb, so it must be disabled if you want unrestricted access to the internet. Check the rules named "ALL" and "DNS" (they are unchecked by default) and click "Save and Apply." This will enable all traffic to pass through the firewall.
Iridium Auto Connect
Setup Iridium To Connect On Any Traffic:
Follow the instructions above to disable the built-in firewall, then proceed with the following steps:
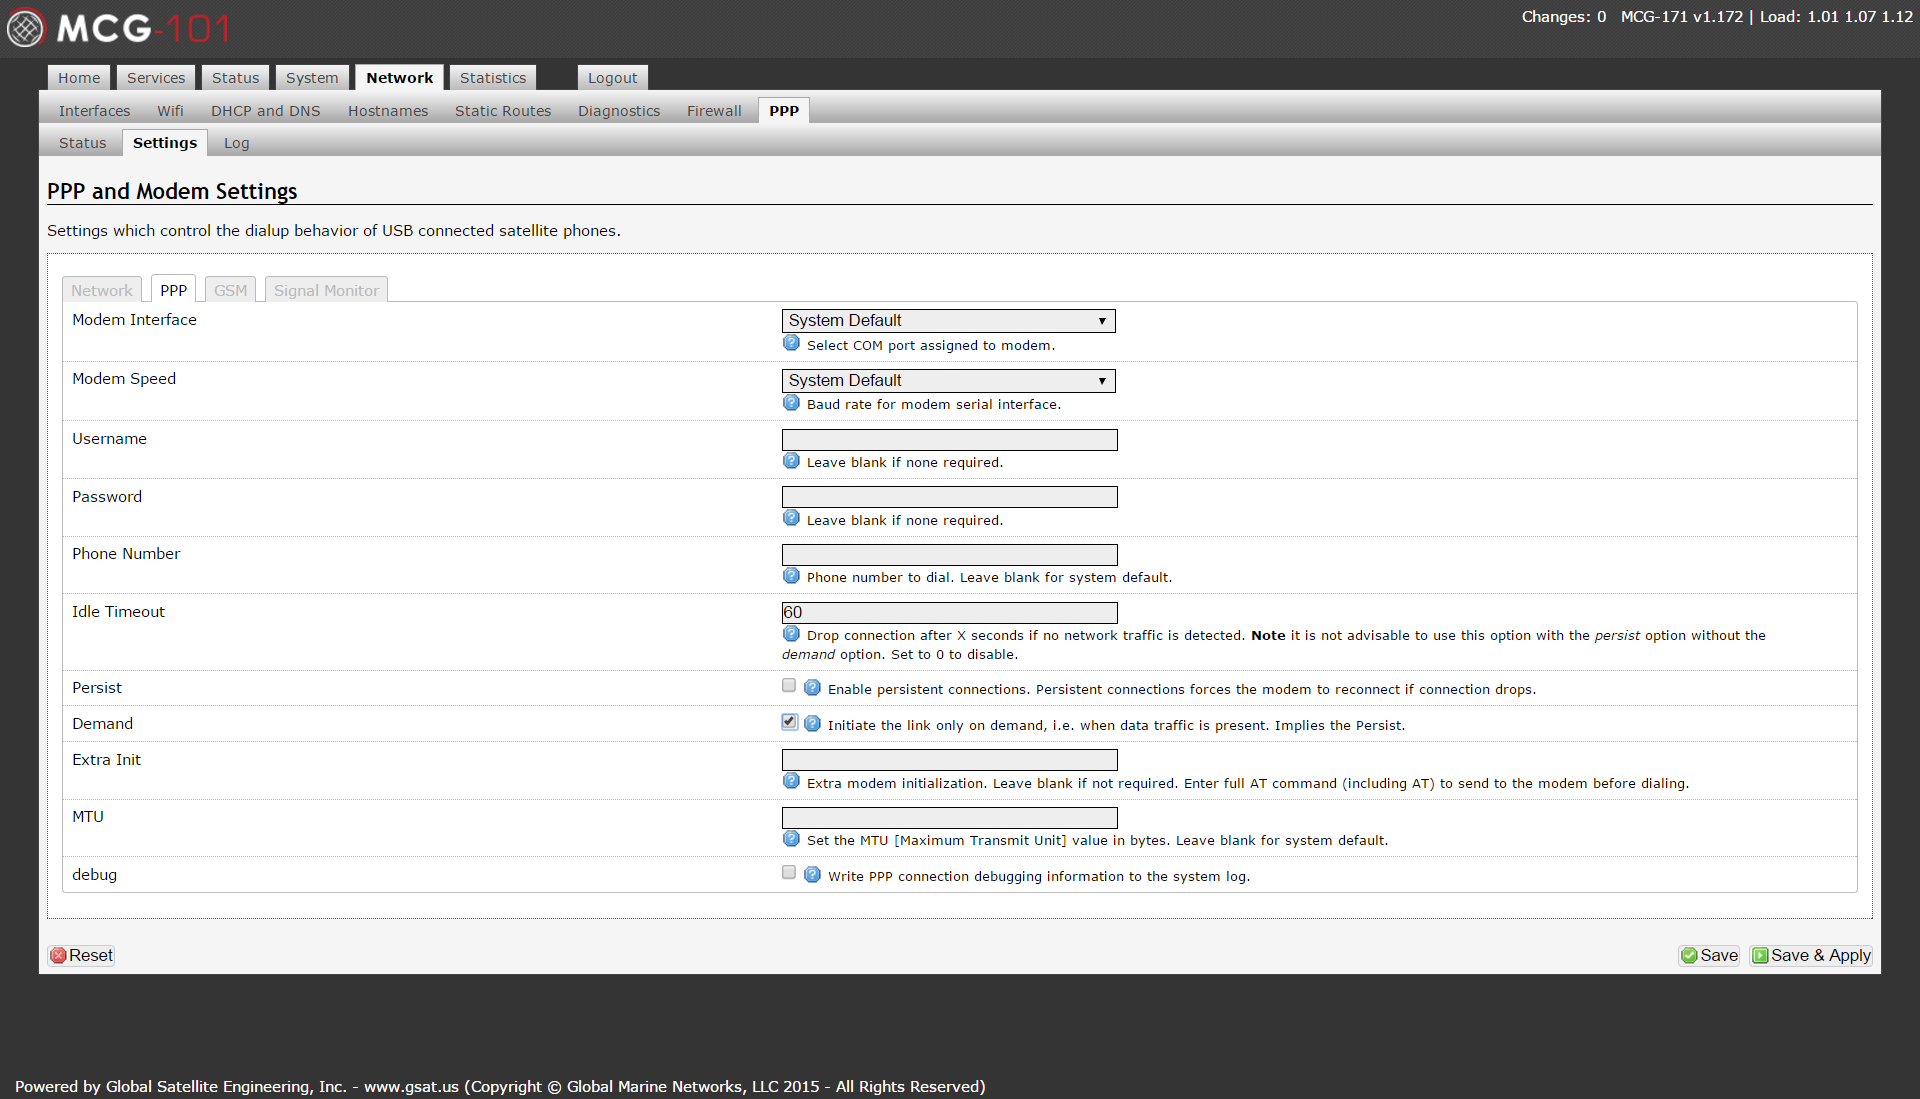
Network>PPP>Settings>PPP - Enable PPP to monitor traffic and connect on demand by enabling the "on demand" feature. PPP will connect as soon as the unit boots, and then it will disconnect if there is no traffic for 60 seconds (configurable). It will reconnect when it sees traffic.
GSM
Setting up GSM Connectivity
If you connect an approved GSM USB dongle, you can set up your MCG-101 to connect via GSM and provide internet via WiFi and Ethernet. You have to manually switch your MCG-101 between Iridium mode and GSM mode.
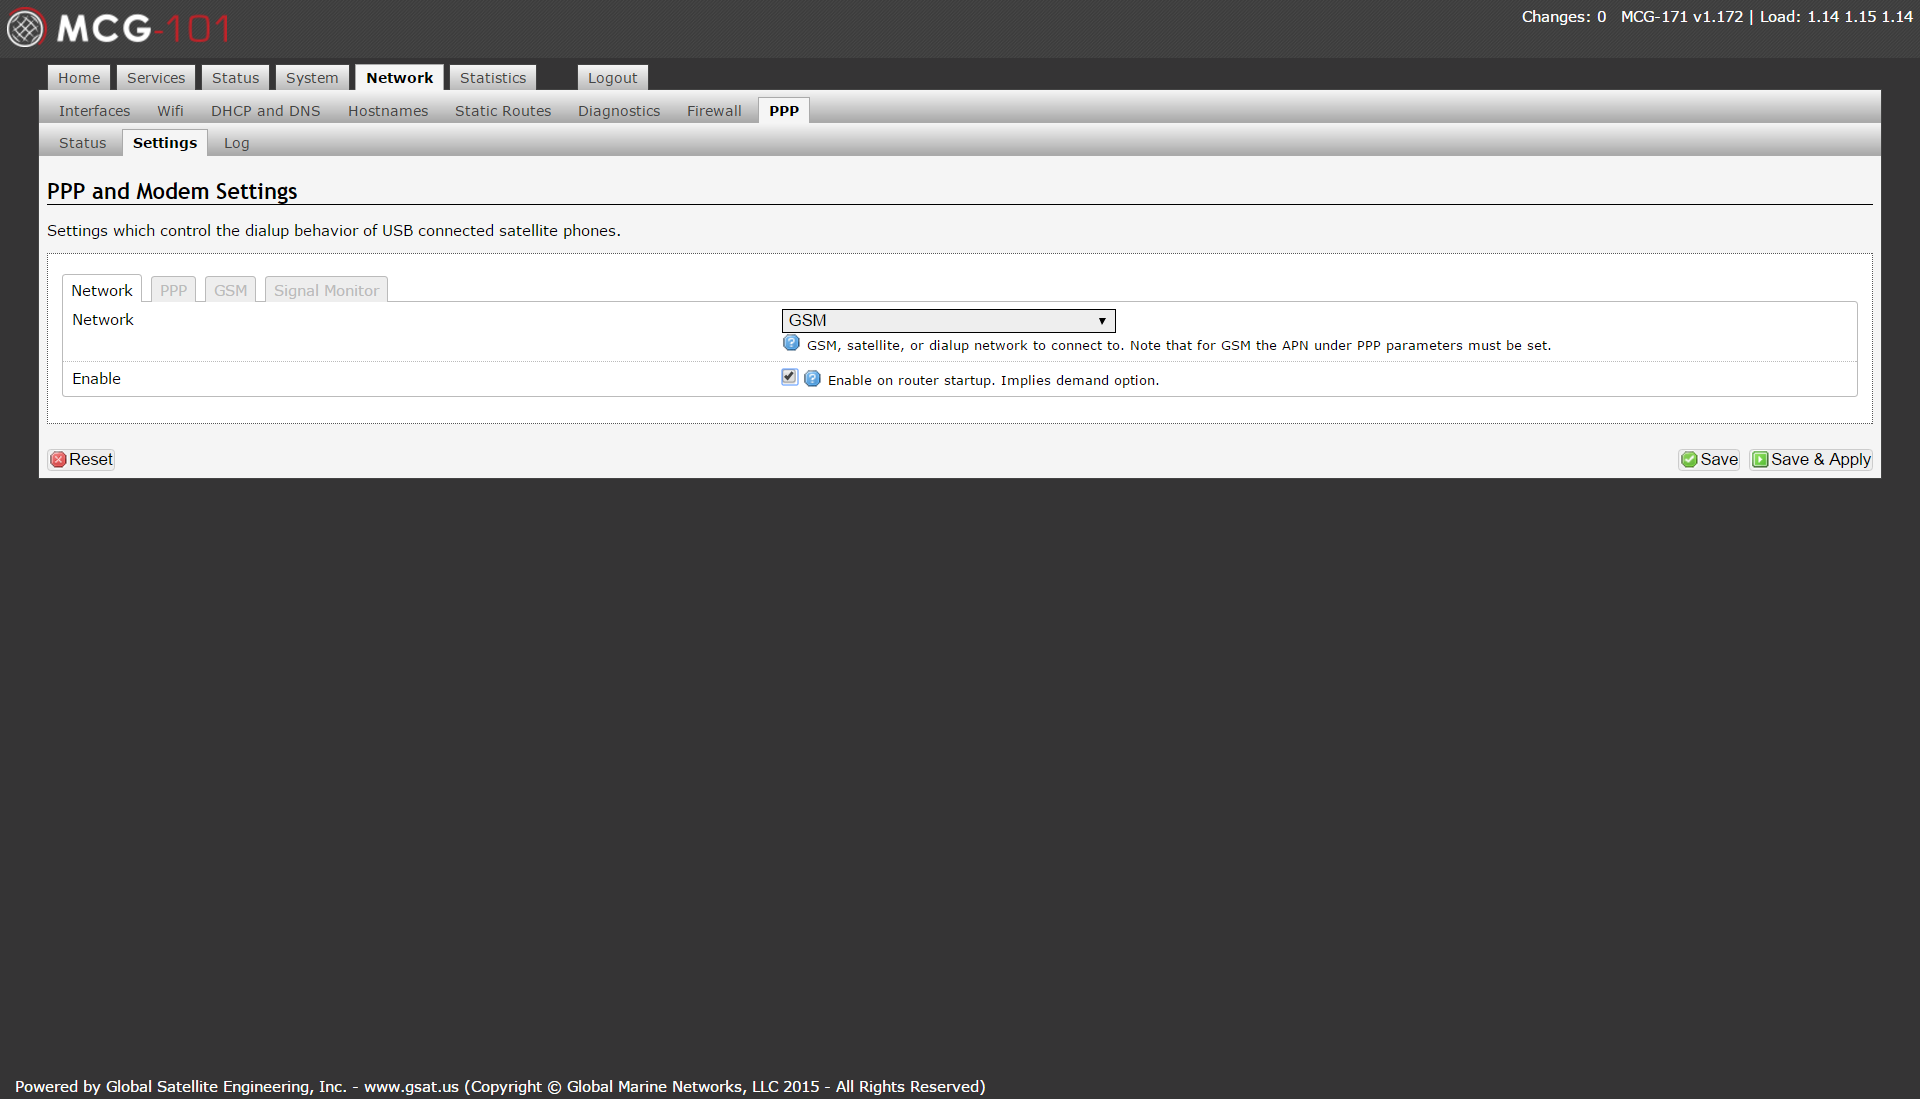
Step 1 Network>PPP>Settings>Network
Network: Select "GSM"
Enable: Select "Enable on router startup"
Click "Save and Apply"
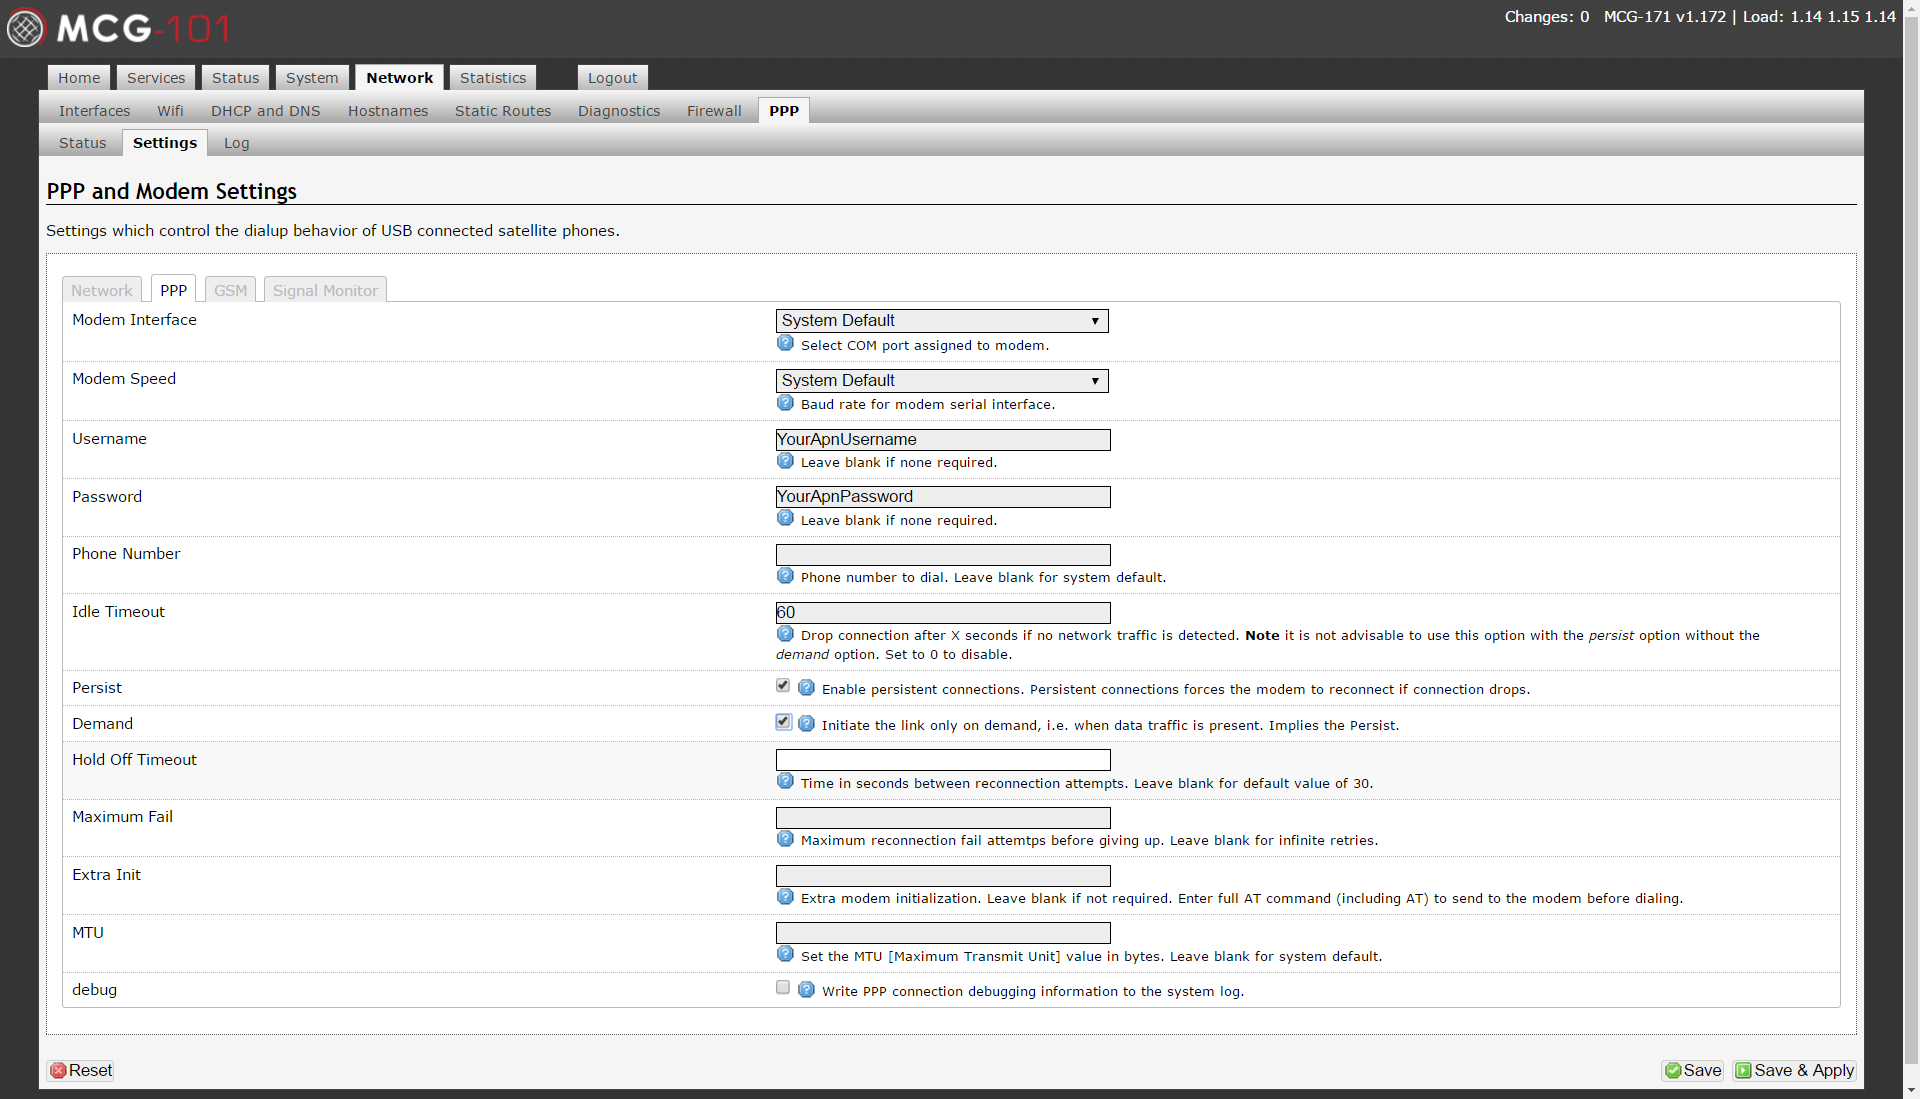
Step 2 Network>PPP>Settings>PPP
Username: Enter your APN username or leave blank for no username
Password: Enter your APN password or leave blank for no password
Persist: Select "Enable persistent connections"
(optional) Demand: Select "Initiate the link only on demand." This is not recommended for GSM connectivity
Click "Save and Apply"
Step 3 Network>PPP>Settings>GSM
APN: Enter your APN
Click "Save and Apply"

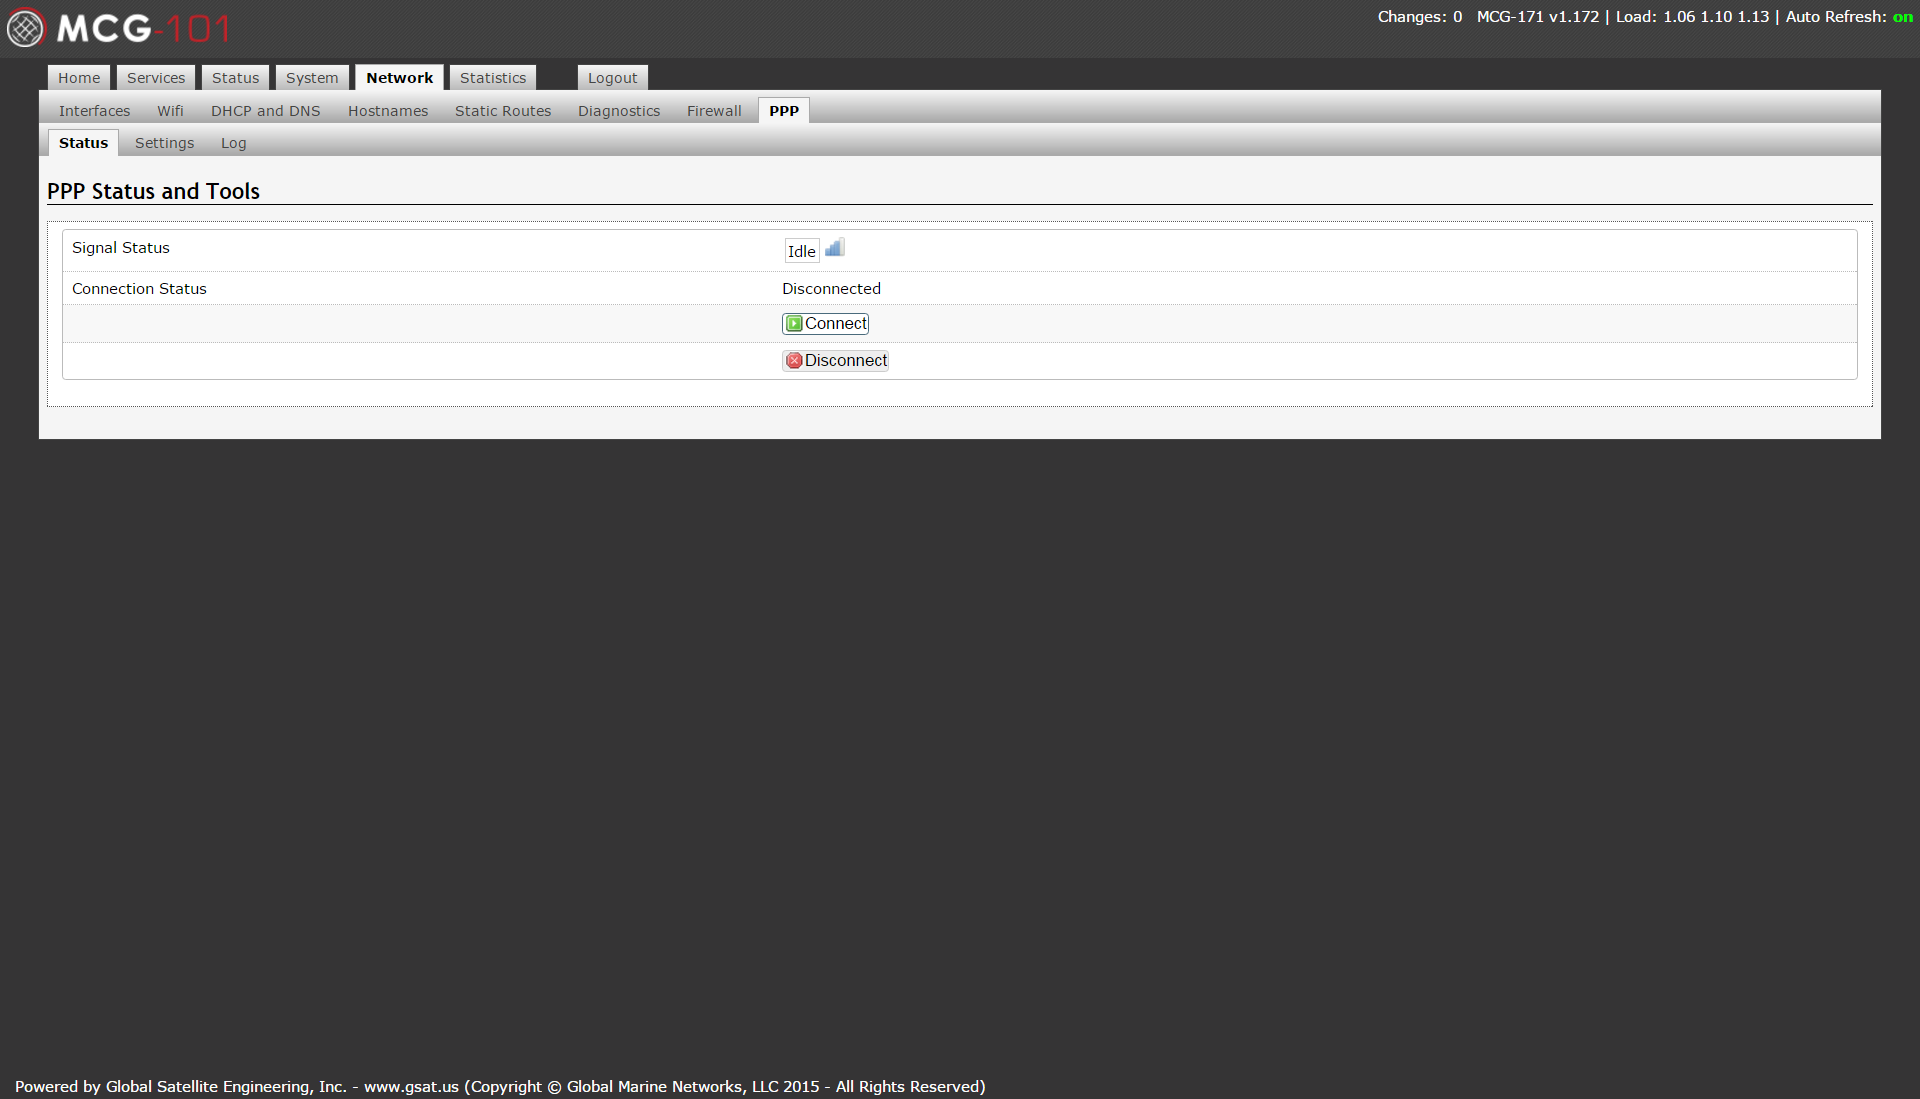
Step 4 Network>PPP>Status
Connection Status: Click "Connect" to initiate connection
AT Command Interface to Iridium
How to Communicate Directly with the Iridium Modem
If you have an application where you would like to send SBD, SMS, or other AT commands directly to the Iridium modem for your application, you can do so by connecting to the Ethernet port or via WiFi and creating a TCP socket to the unit, which will be translated to the serial port of the unit. You cannot use this interface for dialup data because there is no flow control for packets from your application to the Iridium modem on this port. RUDICS applications could possibly operate over this port on a case-by-case basis because of the lack of flow control.
Step 1
telnet 192.168.10.1 5454
Step 2
send “at+login=webxaccess” to login
Step 3
send “at+pass” to switch to pass-thru mode
Now you can enter commands like AT+SBDWB=[bytes], which are sent directly to the modem. From here, you can follow the attached SBD guide, starting at Section 6.1.2, on how to load an SBD message into the queue.